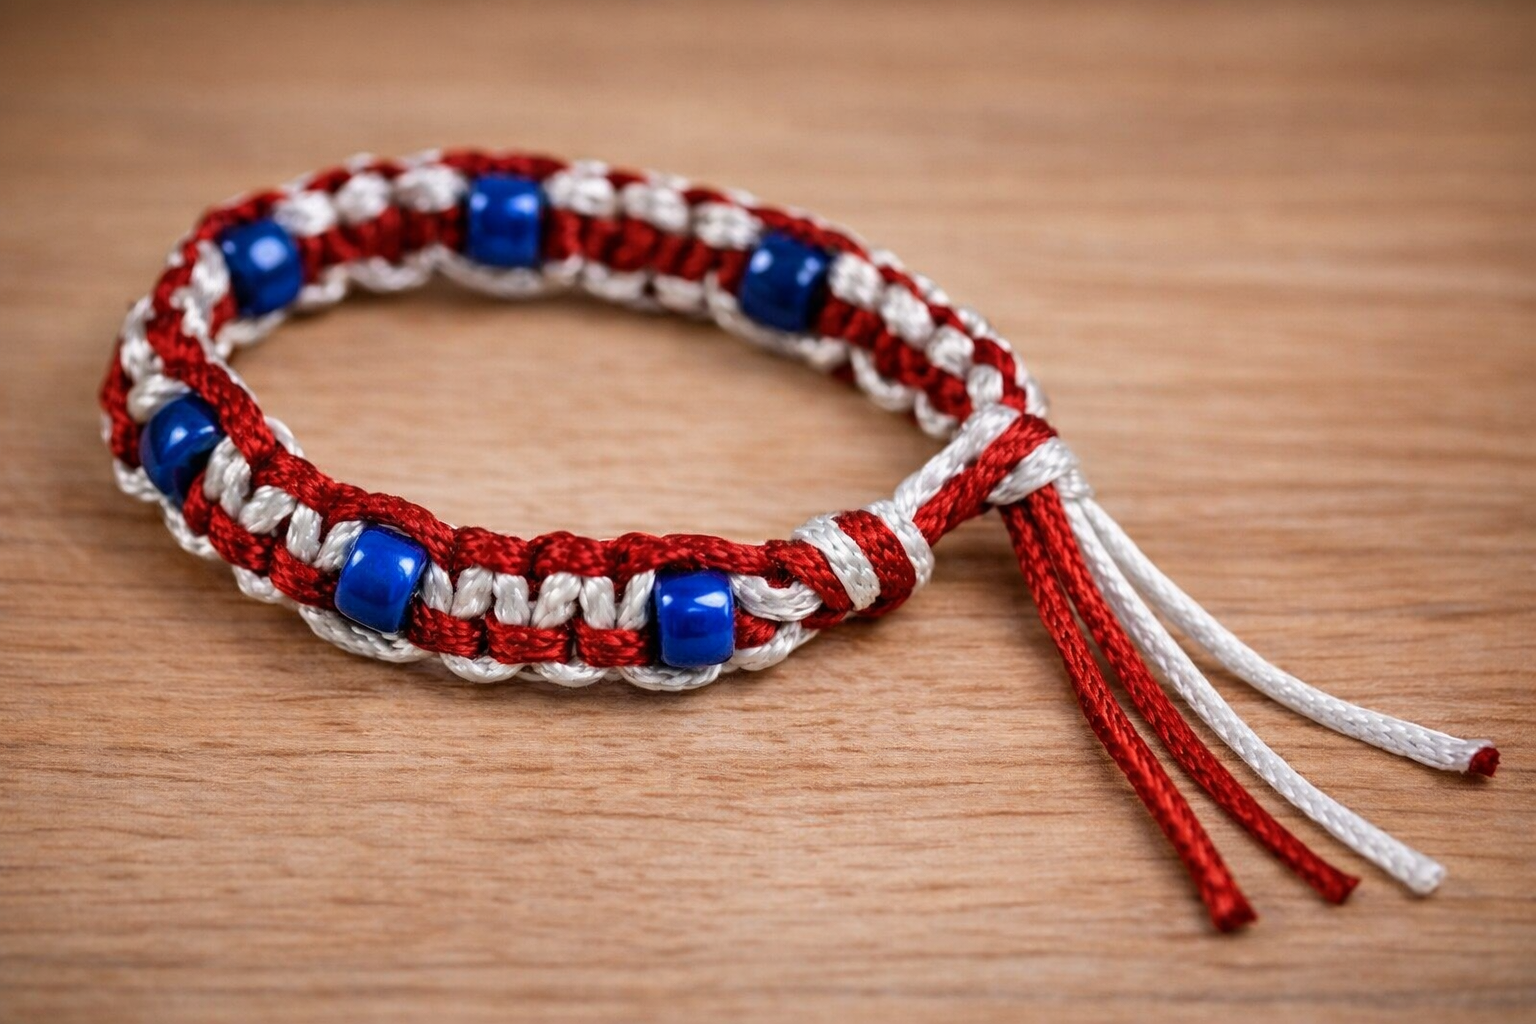
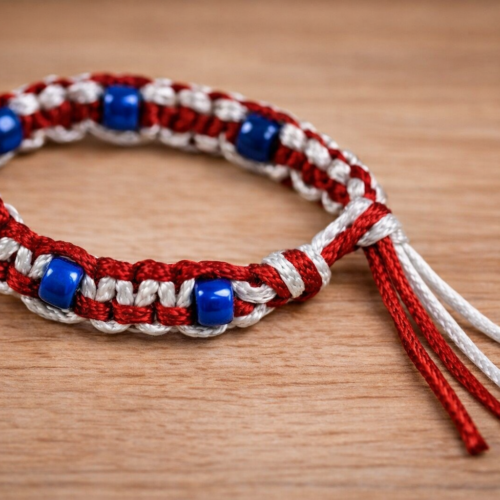
Patriotic Macrame Bracelet Craft
Fashionable and patriotic, this easy macrame bracelet is perfect for beginners. It uses just one simple knot, which makes it a great project for kids, teens, and even summer camp groups. Wear it for Memorial Day, the Fourth of July, Veterans Day, or any patriotic celebration.
This is one of those easy crafts for kids that looks impressive but is simple to make. Once children learn the basic knot, they can create bracelets in many different color combinations.
Fun Facts About Macrame
Macrame is the art of knotting cord or string into decorative patterns. It became very popular in the 1970s, but it has actually been around for hundreds of years.
Common materials for macrame include cotton twine, linen, jute, leather, yarn, nylon, and hemp. When choosing a material, think about its strength, texture, stiffness, and thickness.
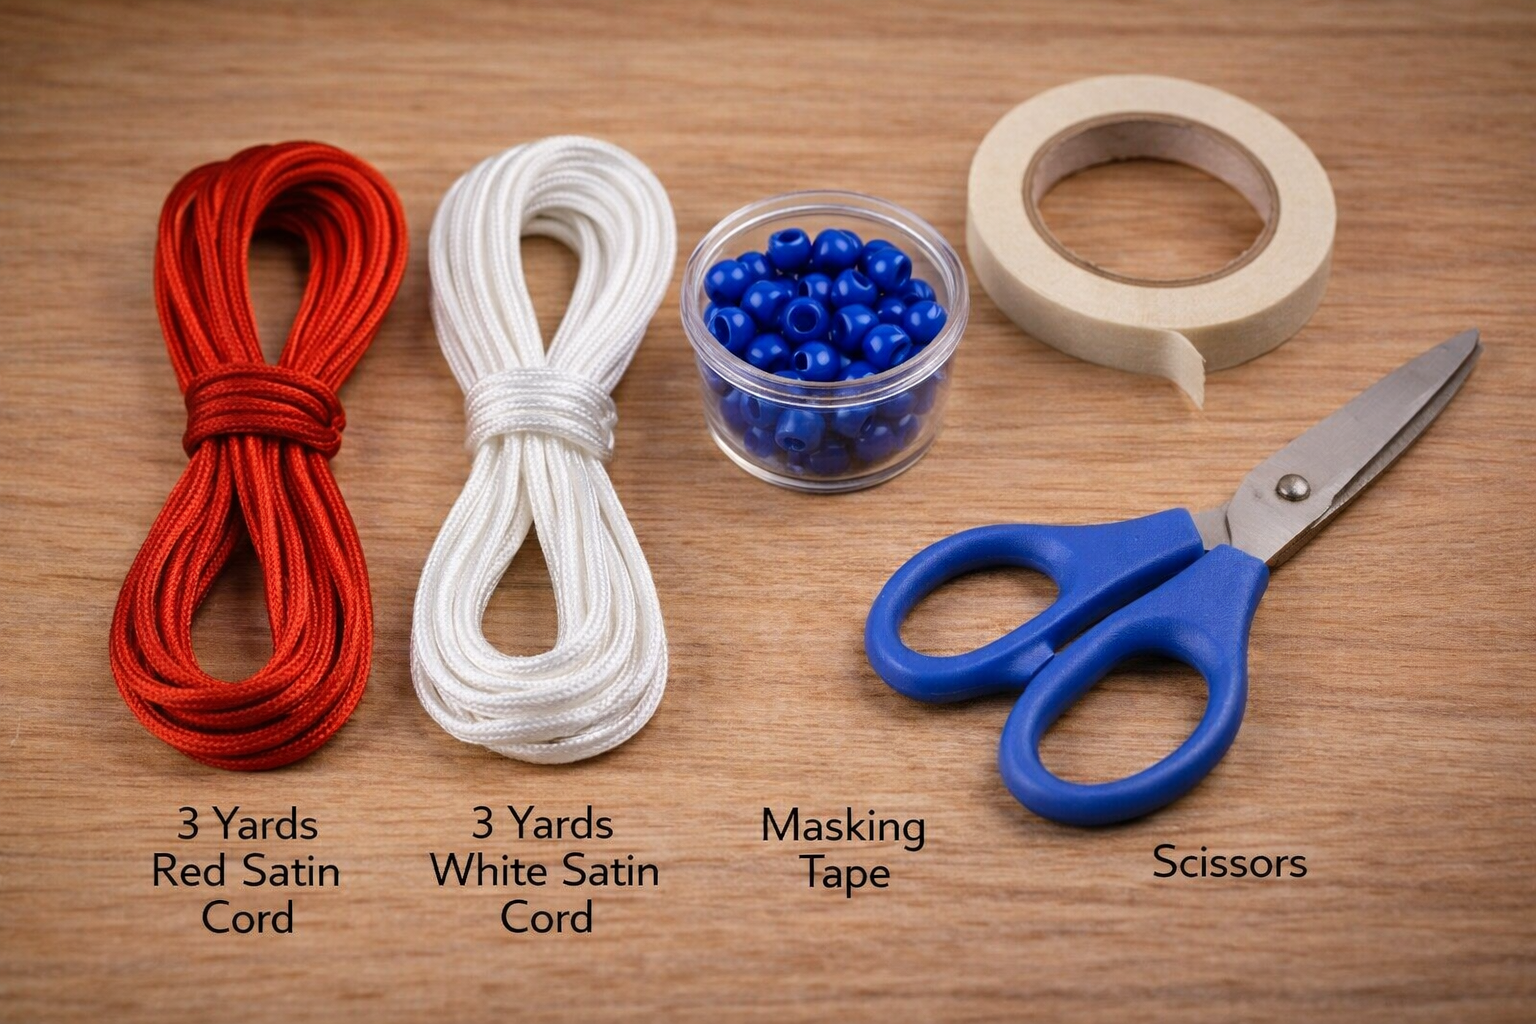
Supplies
- 3 yards Red Satin Cord
- 3 yards White Satin Cord
- Blue Pony Beads
- Masking Tape or Clipboard
- Scissors
Instructions
Step 1: Prepare the Cords
Cut 3 yards of red satin cord and 3 yards of white satin cord.
Fold both pieces 18 inches from one end. Gather the folded strands together. You will now have two 18 inch strands and two shorter strands.
Tie all strands together in a knot about 1/2 inch from the fold. The folded loop will become the bracelet closure.
Secure the looped end to a table using masking tape, or clip it to a clipboard to keep it steady while you work.
Pull the two long 18 inch strands taut and tape their ends down. These will serve as your center strands.
Step 2: Begin the Macrame Knot
Using the outer strands, tie a basic macrame knot around the two center strands. Continue tying the same knot over and over to create the bracelet pattern.
Keep your knots snug and even as you work down the length of the bracelet.
Adding Beads
Beads can be added at any point while tying your knots.
Simply slide a blue pony bead onto one, two, or all four strands before tightening the next knot. On the sample bracelet, beads were added only to the two center strands for a neat, balanced look.
You can space beads evenly or cluster them together to create different designs.
Finishing
When your bracelet reaches the desired length, tie a knot to match the knot at the beginning.
Remove the tape or clipboard.
Trim the ends, leaving enough length to tie the bracelet around your wrist. To wear, pull half of the strands through the loop at the top and tie securely.
Patriotic Macrame Bracelet Craft
Supplies
- 3 yards Red Satin Cord
- 3 yards White Satin Cord
- Blue Pony Beads
- Masking Tape or Clipboard
- Scissors
Instructions
Step 1: Prepare the Cords
- Cut 3 yards of red satin cord and 3 yards of white satin cord.
- Fold both pieces 18 inches from one end. Gather the folded strands together. You will now have two 18 inch strands and two shorter strands.
- Tie all strands together in a knot about 1/2 inch from the fold. The folded loop will become the bracelet closure.
- Secure the looped end to a table using masking tape, or clip it to a clipboard to keep it steady while you work.
- Pull the two long 18 inch strands taut and tape their ends down. These will serve as your center strands.
Step 2: Begin the Macrame Knot
- Using the outer strands, tie a basic macrame knot around the two center strands. Continue tying the same knot over and over to create the bracelet pattern.
- Keep your knots snug and even as you work down the length of the bracelet.
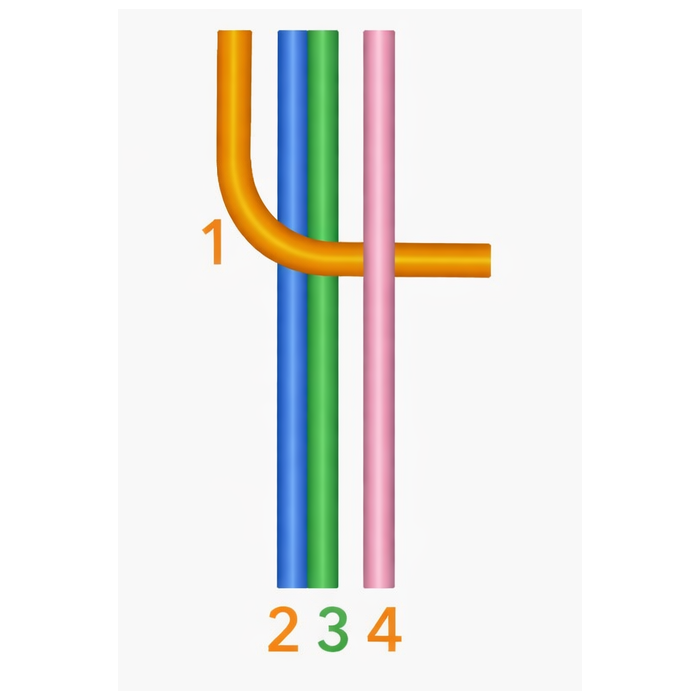
Loop Details
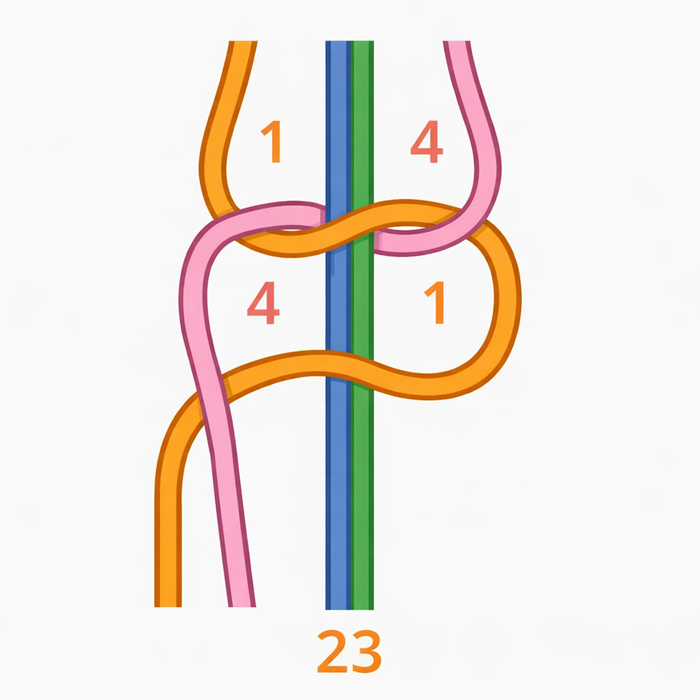
- Cross strand 1 over strands 2 & 3, and under strand 4.

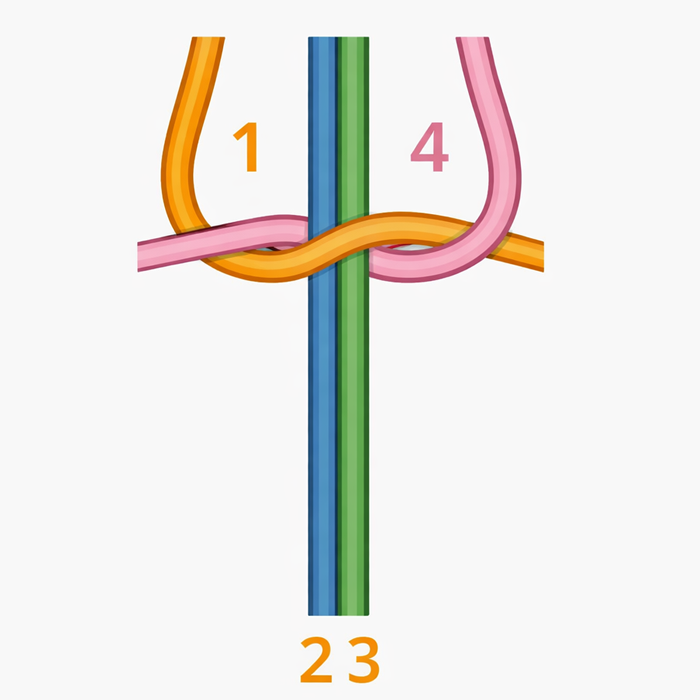
- Bring strand 4 under strands 2 & 3, then up through the loop created by strand 1. Tighten.
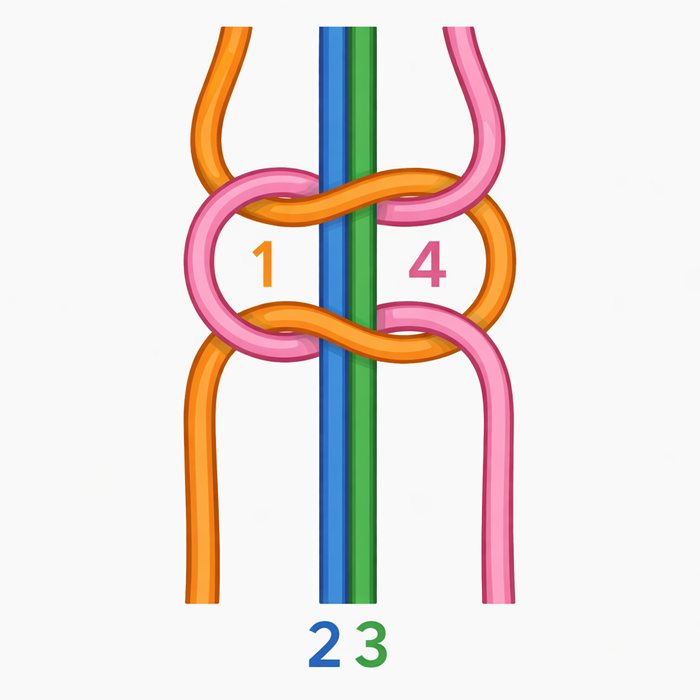
- Cross strand 1 over strands 2 & 3 and under strand 4.
- Bring strand 4 under strands 2 & 3, then up through the loop created by strand 1. Tighten.
Notes
Teacher Friendly Educational Extension
This bracelet craft makes a wonderful classroom activity around patriotic holidays. Students can:
- Research the meaning of the colors red, white, and blue in the American flag.
- Write a short paragraph about why we celebrate the Fourth of July.
- Practice measuring skills by accurately cutting 3 yards of cord.
- Explore patterns by planning bead placement in repeating sequences such as ABAB or AABB.
Display finished bracelets on a bulletin board with student writing attached for a meaningful holiday craft display.
Supplies
Instructions
Patterns, Templates and Printables
Click on a pattern to open it in a new window