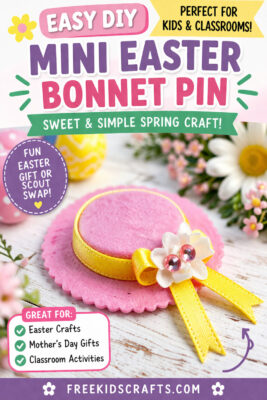
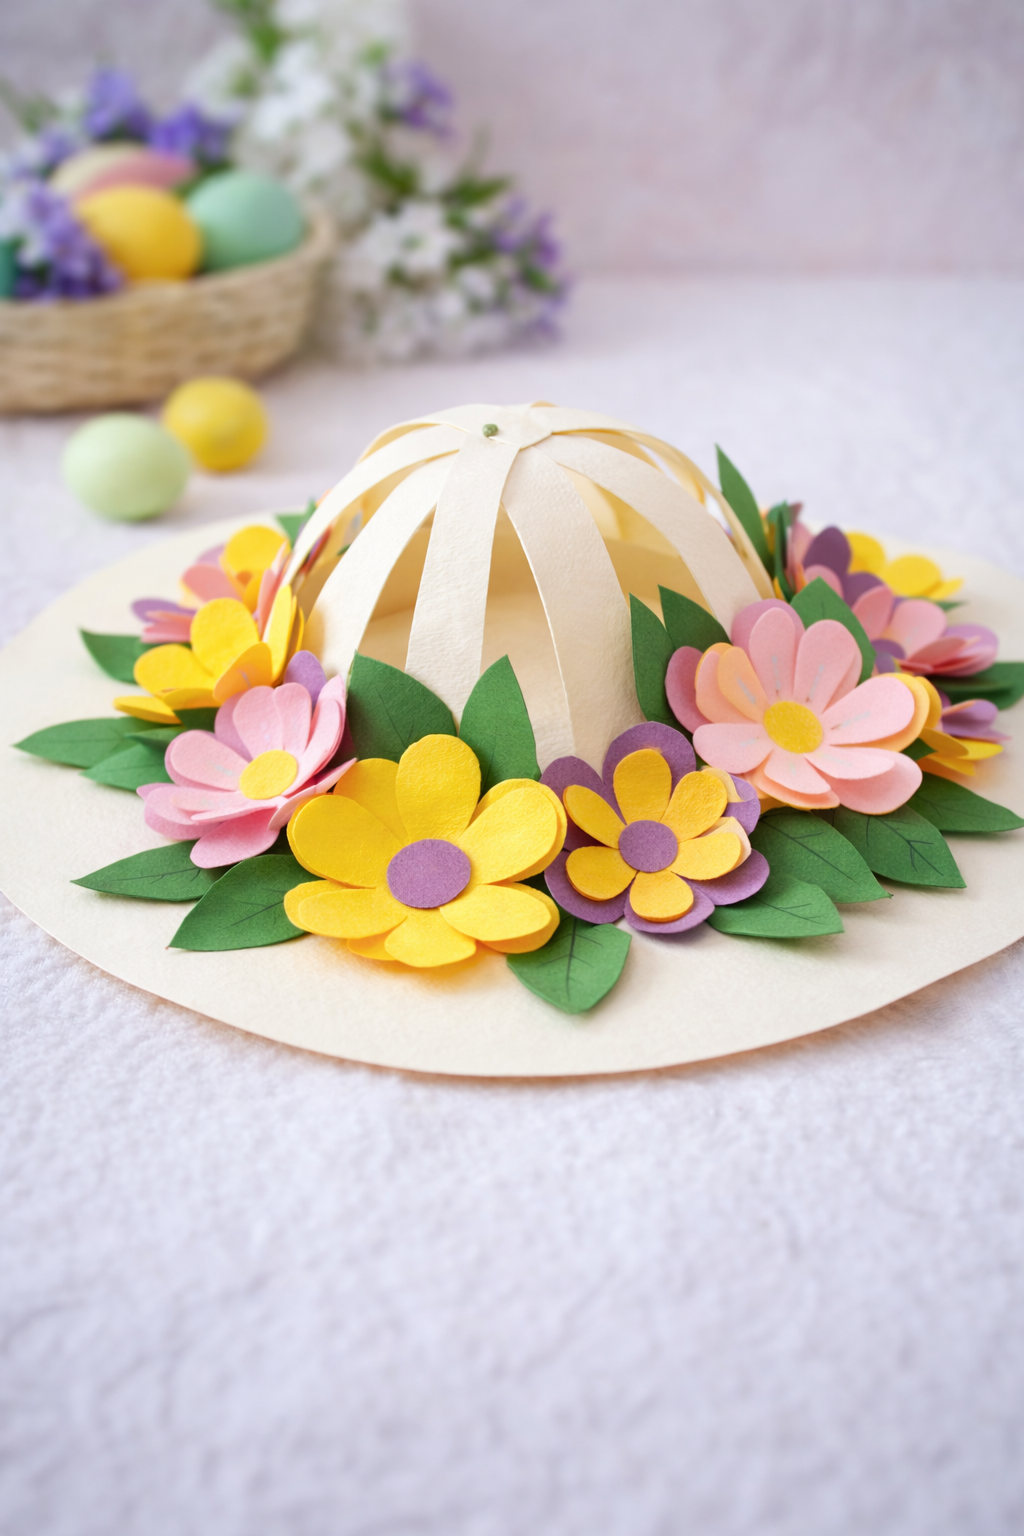
Make Your Own Easter Bonnet
Make Your Own Easter Bonnet for an Easter parade, dress-up fun, or a pretty spring table centerpiece. This cheerful paper craft is a lovely way for kids to celebrate the season with flowers, bright colors, and a little creativity. The printable templates make it easy to cut out the flowers and leaves, then decorate the bonnet in your own style.
This is a fun spring craft for kids, classrooms, scout groups, and homeschool art time. It also works well as an Easter activity for children who enjoy printable templates and hands-on crafting.
Supplies
- Heavy ivory paper, 18 x 24 inches
- Letter size paper in pink, yellow, purple, and green
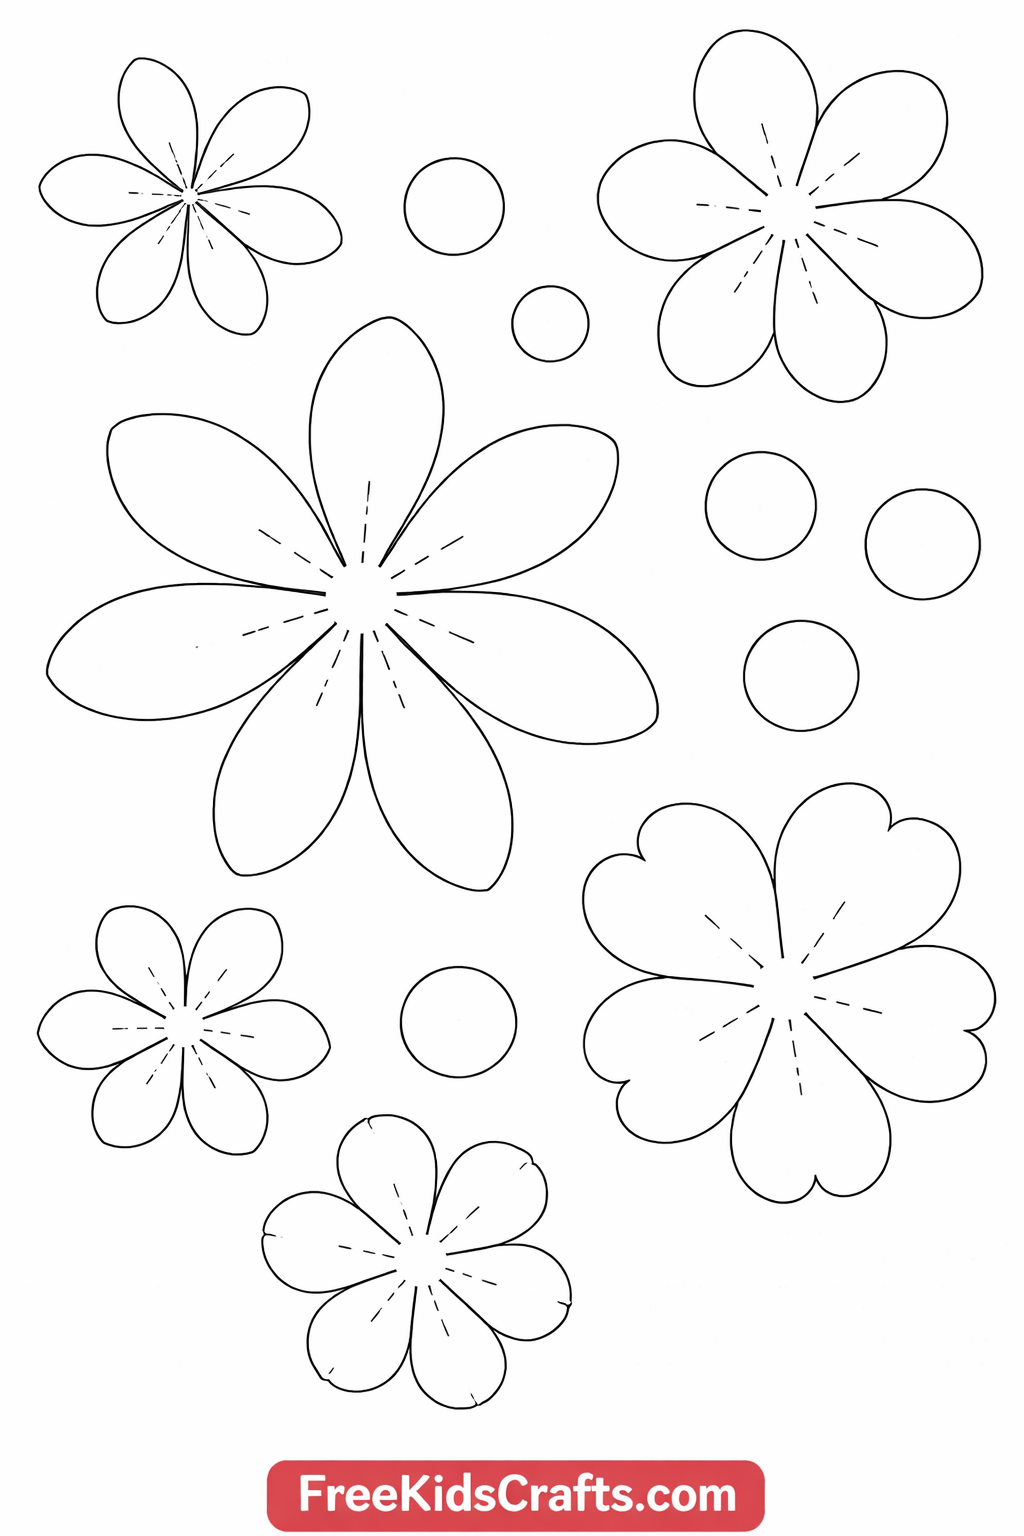
- Flower templates, printed 2 of each on pink, yellow, and purple paper
- Leaf templates, printed 2 of each on green paper
- Tacky glue
- Scissors
- Standard hole punch
Instructions
- Cut the heavy ivory paper into a circle about 16 inches wide. Cut a smaller circle about 7 inches wide from the center to make the bonnet brim. The exact size does not need to be perfect. Plates or bowls can be helpful for tracing circles.
- Cut twelve strips from the same ivory paper, each about 1 inch by 11 inches. Fold up about 1/4 inch on both ends of every strip.
- Slide the folded ends of one strip under the inner edge of the brim so the strip arches upward. Add a second strip across the first to begin forming the crown of the bonnet.
- Continue adding strips, crossing them over one another until the crown looks full and rounded.
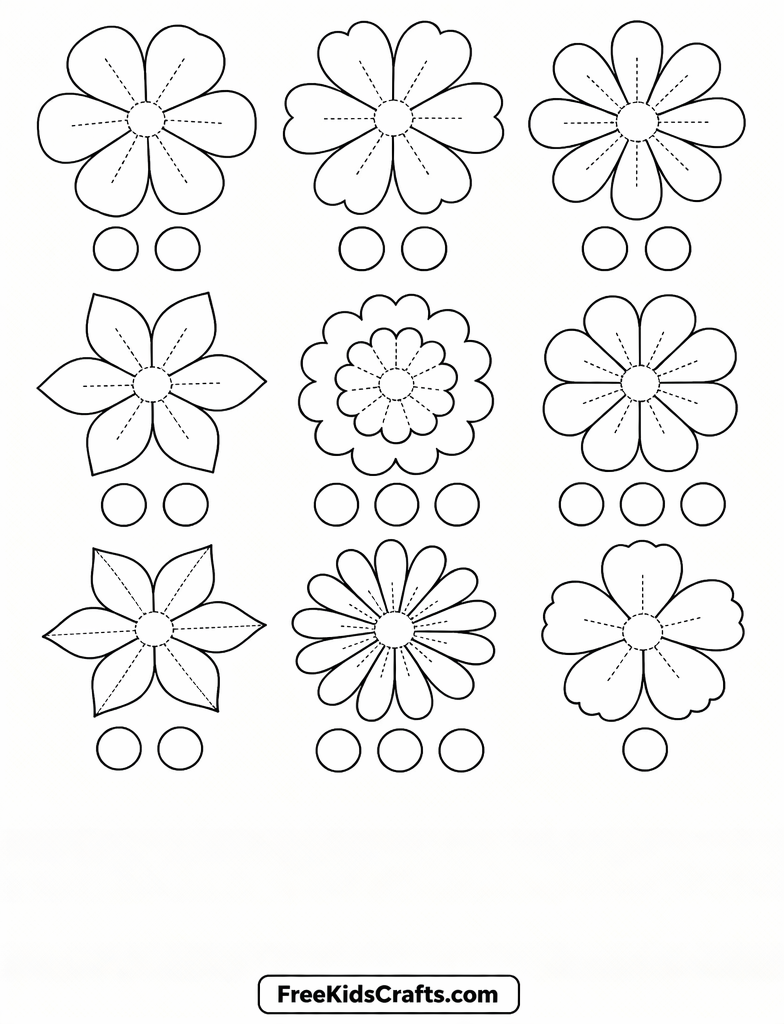
- Print and cut out the flower and leaf templates. The printed side will become the back of each piece. Gently bend the pieces along the dotted lines to give the flowers and leaves more shape.
- Layer the flower pieces and glue them together with a small dot of glue in the center of each layer.
- Use a standard hole punch to make small paper circles for the flower centers. Glue the circles into the middle of the flowers.
- Glue the flowers around the bonnet brim. Tuck the leaves under the flowers as you go.
- Let everything dry completely before wearing the bonnet or using it as a centerpiece.
Fun Facts
Easter bonnets have been part of spring celebrations for many years. Long ago, people wore their best new clothes in spring as a symbol of fresh beginnings. Over time, hats decorated with flowers, ribbons, and other pretty details became a fun Easter tradition.
Flowers are often used on Easter bonnets because they represent spring, growth, and renewal.
Patterns, Templates and Printables
Print the flower templates on pink, yellow, and purple paper, with 2 of each flower shape.
Print the leaf templates on green paper, with 2 of each leaf shape.
Use the templates at full size so the bonnet decorations fit the project correctly.


Teacher Friendly Educational Extension
Turn this Easter bonnet craft into a fun classroom activity by having children design their bonnets around a theme like spring flowers, garden colors, or Easter parade style.
You can also extend the lesson with:
Art Extension
Talk about layering shapes, using color combinations, and adding dimension by bending paper petals and leaves.
Writing Extension
Ask children to write a few sentences about where they would wear their bonnet and what makes their design special.
Social Studies Extension
Discuss how clothing and holiday traditions have changed over time and how people celebrate spring in different places.
Classroom Display Idea
Display the finished bonnets on a table as a cheerful spring centerpiece display, or hang the flower templates and photos of the finished hats on a bulletin board.
Supplies
Instructions
Cut heavy ivory paper into approximately a 16" circle with a 7" circle cut out of the middle. If you have plates or bowls this size it make a good circle. This becomes the hat brim. Exact sizing won't really matter.
Cut twelve 1" x 11" strips out of the same paper. Fold each strip up ¼" from both ends.
Tuck folded ends of one of the strips under the inner circle of the brim allowing the strip to gently bend upward. Do the same with another strip, criss-crossing the first strip.
Continue with additional strips until a solid crown is formed.
Print and cut out flowers and leaves. Printed side will be the back of the flowers and leaves. Bend pieces up slightly on the dotted lines. This will add depth to the flowers. Assemble flowers by layering pieces. Use a small dot of glue in the center of each piece to secure. Punch out small circles with a standard whole punch for flower centers.
Glue the flowers around the hat. Glue on leaves, tucking them under flower petals.
The finished product is a pretty Easter Bonnet or a beautiful table decoration
Patterns, Templates and Printables
Click on a pattern to open it in a new window


Contributor

These projects are created by Terri, Betty, Jamie or one of the talented staff members at MakingFriends.com. They have been created exclusively for publication on FreeKidsCrafts.com with supplies you'll be able to find around your house.