Beaded Snowman Pin
This cheery Beaded Snowman Pin is a fun beginner bead craft for kids who are ready to try a little jewelry making. With safety pins and colorful beads, children can create a happy little snowman to wear on a jacket, backpack, scarf, or winter hat.
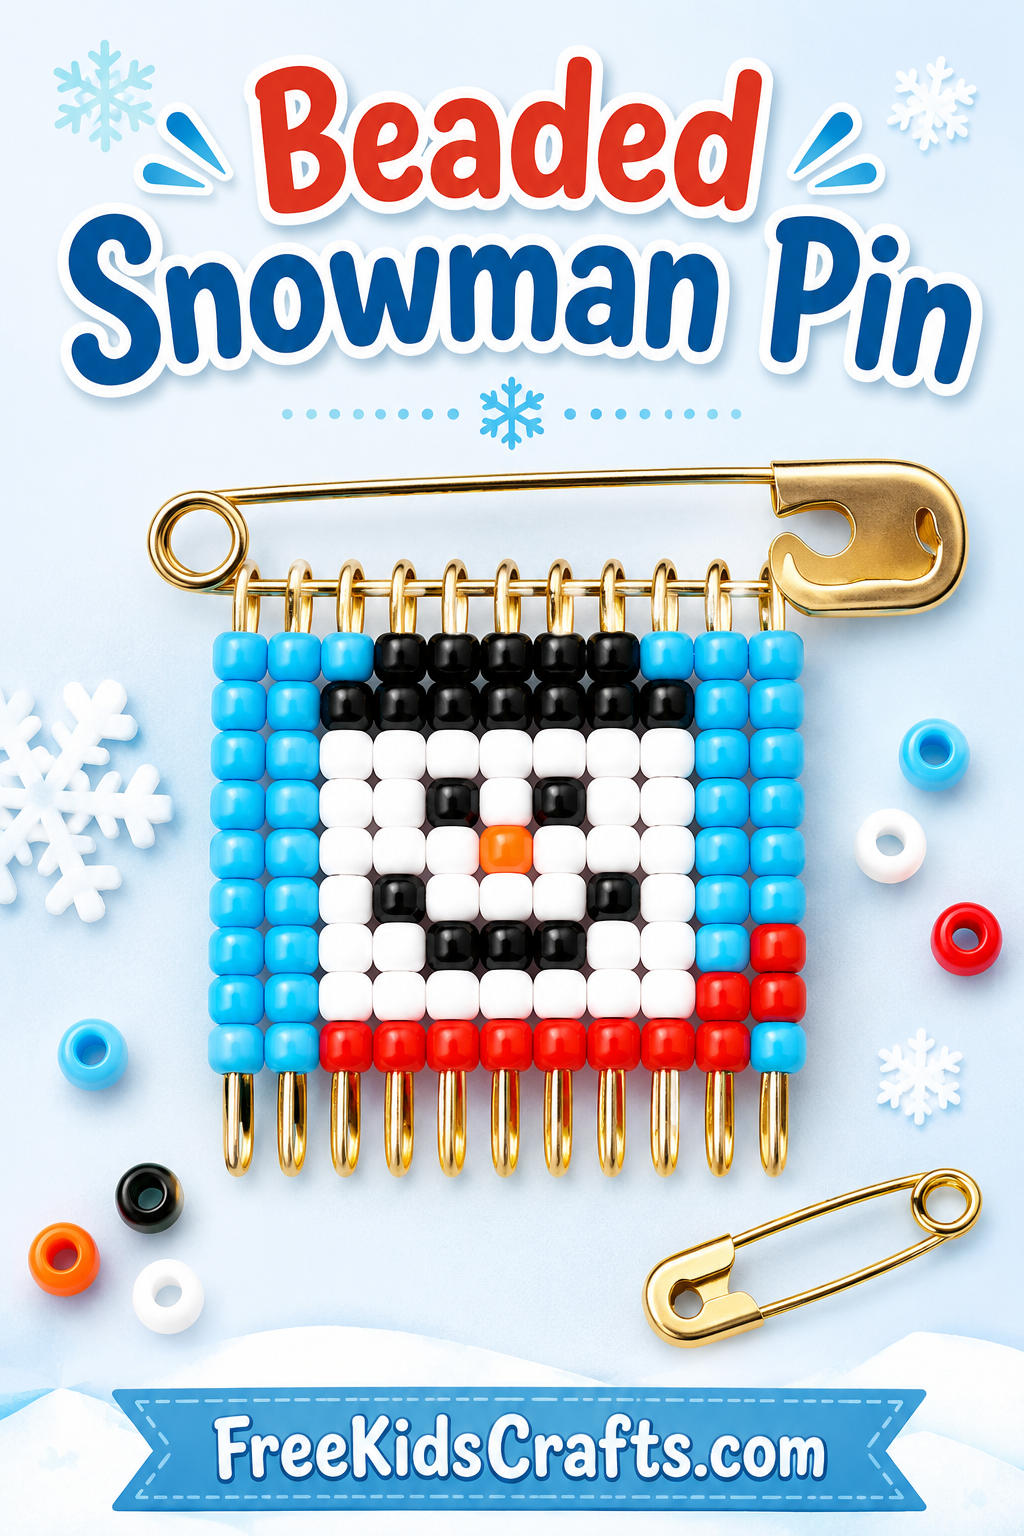
This is a great winter craft for kids, classroom activity, scout project, or handmade gift idea. Younger children may need adult help opening and closing the pins.
Fun Fact
In February 2020, residents of Donnersbachwald, Austria, built a giant snowman named Riesi. It reportedly reached 124.8 feet tall, making it taller than the famous snowwoman built in Maine.
Supplies
For “E” Bead Pins
Small beads, finished pin is about 2 1/4 inches wide
One size 4 safety pin
Eleven size 3 safety pins
“E” beads
For Seed Bead Pins
Tiny beads, finished pin is about 1 1/2 inches wide
One size 2 safety pin
Eleven size 0 safety pins
Seed beads
For Both Projects
Split ring pliers or a metal nail file
Needle-nose pliers
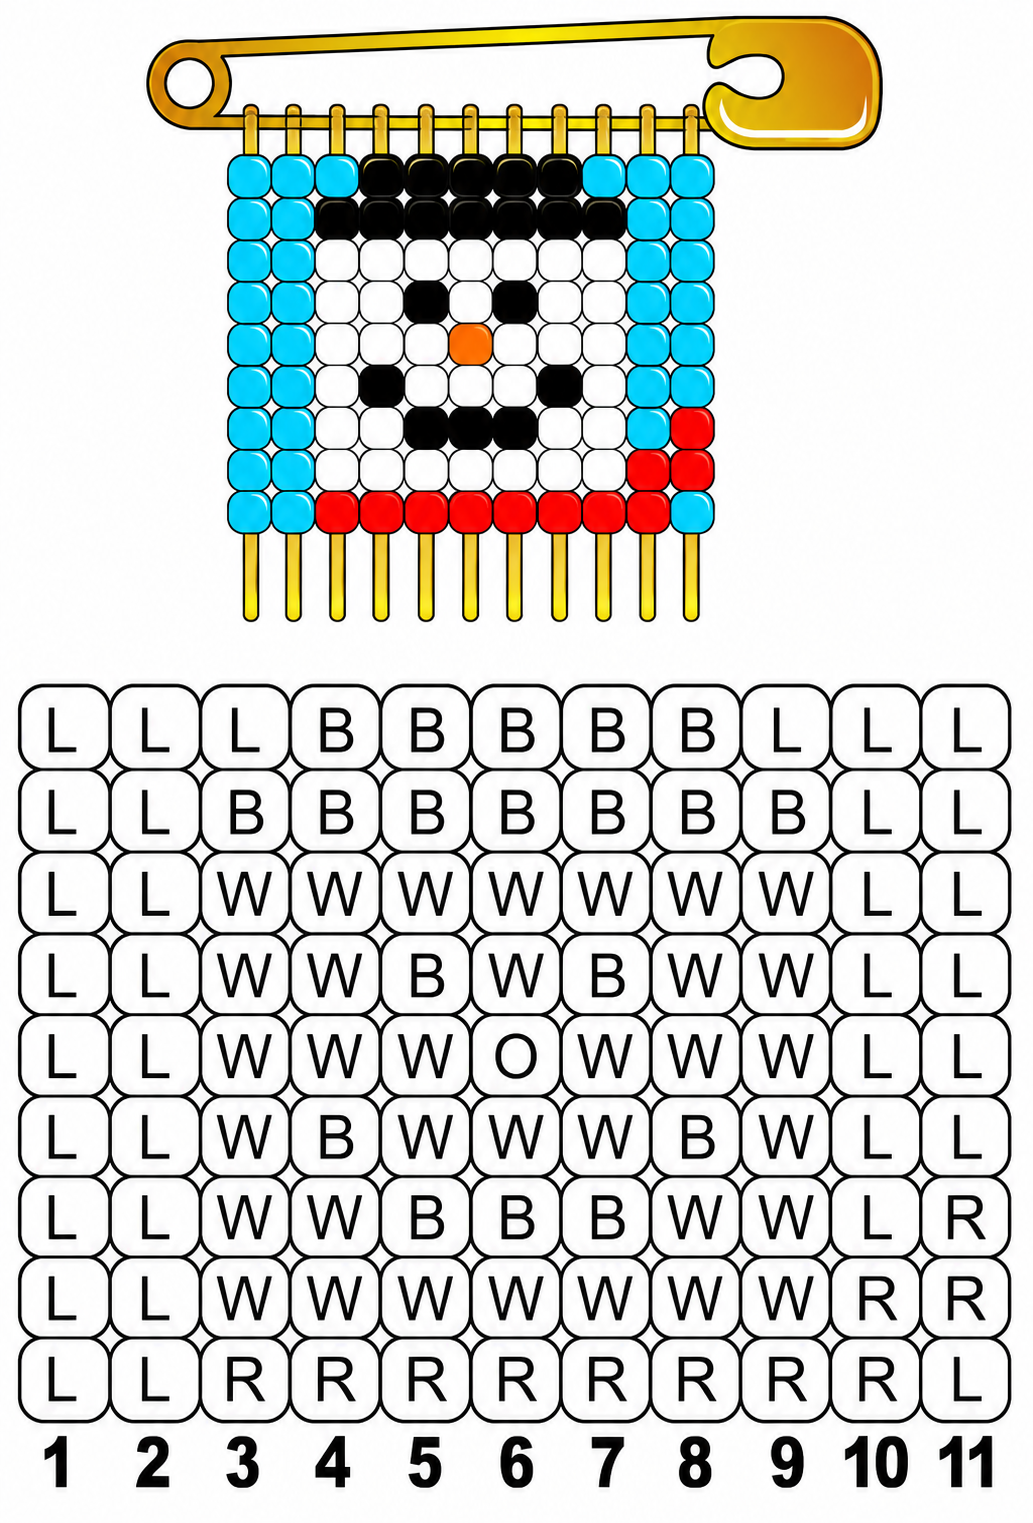
Printable snowman bead pattern
Instructions
- Click on the printable pattern below before you begin. Each row hanging down from the larger safety pin is made with one smaller safety pin.
- Open the smaller pins and string the beads onto each pin by following the printable pattern. Start at the top of each row and work down.
- Use needle-nose pliers to squeeze each pin head closed permanently after the beads are added.
- Please note that beads are often irregular in size. Some seed beads may be too large to fit on the smaller pins, and some “E” beads may be too small for the larger version. Choose the beads that fit best.
- Use split ring pliers or the point of a metal nail file to carefully bend open the coil at the base of the larger safety pin.
- Thread the coil of each beaded pin onto the front shank of the larger pin. Gently work the pins around the opened coil and onto the back shank of the larger safety pin.
- Follow the pattern beginning with pin 11. Add the beaded pins from right to left until your snowman design is complete.
Pattern Key
L = Light Blue
B = Black
W = White
O = Orange
R = Red
Craft Tips
An adult should help with bending the safety pin coil and closing the pins securely.
Sort the beads by color before starting. This makes the pattern easier to follow and helps kids practice organization and fine motor skills.
This beaded snowman pin makes a cute winter gift, stocking stuffer, classroom craft, or handmade holiday accessory.
Patterns, Templates and Printables
Click on a pattern to open it in a new window to print.
Teacher Friendly Educational Extension
Turn this beaded snowman craft into a simple pattern and counting activity. Have kids count how many beads of each color they used, then compare the totals.
You can also ask students to describe the snowman using winter vocabulary words such as snowy, frosty, cheerful, chilly, and bright. For a writing extension, have each child write a short story about where their snowman pin would go on a winter adventure.
Supplies
For "E" Bead Pins
(small beads, 2-1/4" wide pin)
One Safety Pin, Size 4
Eleven Safety Pins, Size 3
"E" Beads
For Seed Bead Pins
(tiny beads, 1-1/2" wide pin)
One Safety Pin, Size 2
Eleven Safety Pins, Size 0
Seed Beads
Split Ring Pliers or
Metal Nail File
Needle-nose pliers
Instructions
Click on Printables for pattern diagram.
Each row hanging down is the smaller pin with beads strung on it. Open these pins and string beads following the pattern provided. Start at the top with of each row and work down. Use pliers to squeeze the pin head closed permanently.
Note: Beads are are irregular in size. You may not be able to use the larger seed beads in your package and you may not want to use the smaller "E" beads in your package.
Use a split ring pliers or the point of metal nail file to bend open the coil at base of the larger pin. Thread coil of the beaded pins onto front shank of larger pin, forcing them around opened coil and onto the back shank of the larger pin. Follow pattern beginning with pin 11 and adding beaded pins working from right to left.
L=LIGHT BLUE B=BLACK W=WHITE O=ORANGE R=RED
This craft reprinted courtesy of Terri of MakingFriends.com.
Patterns, Templates and Printables
Click on a pattern to open it in a new window