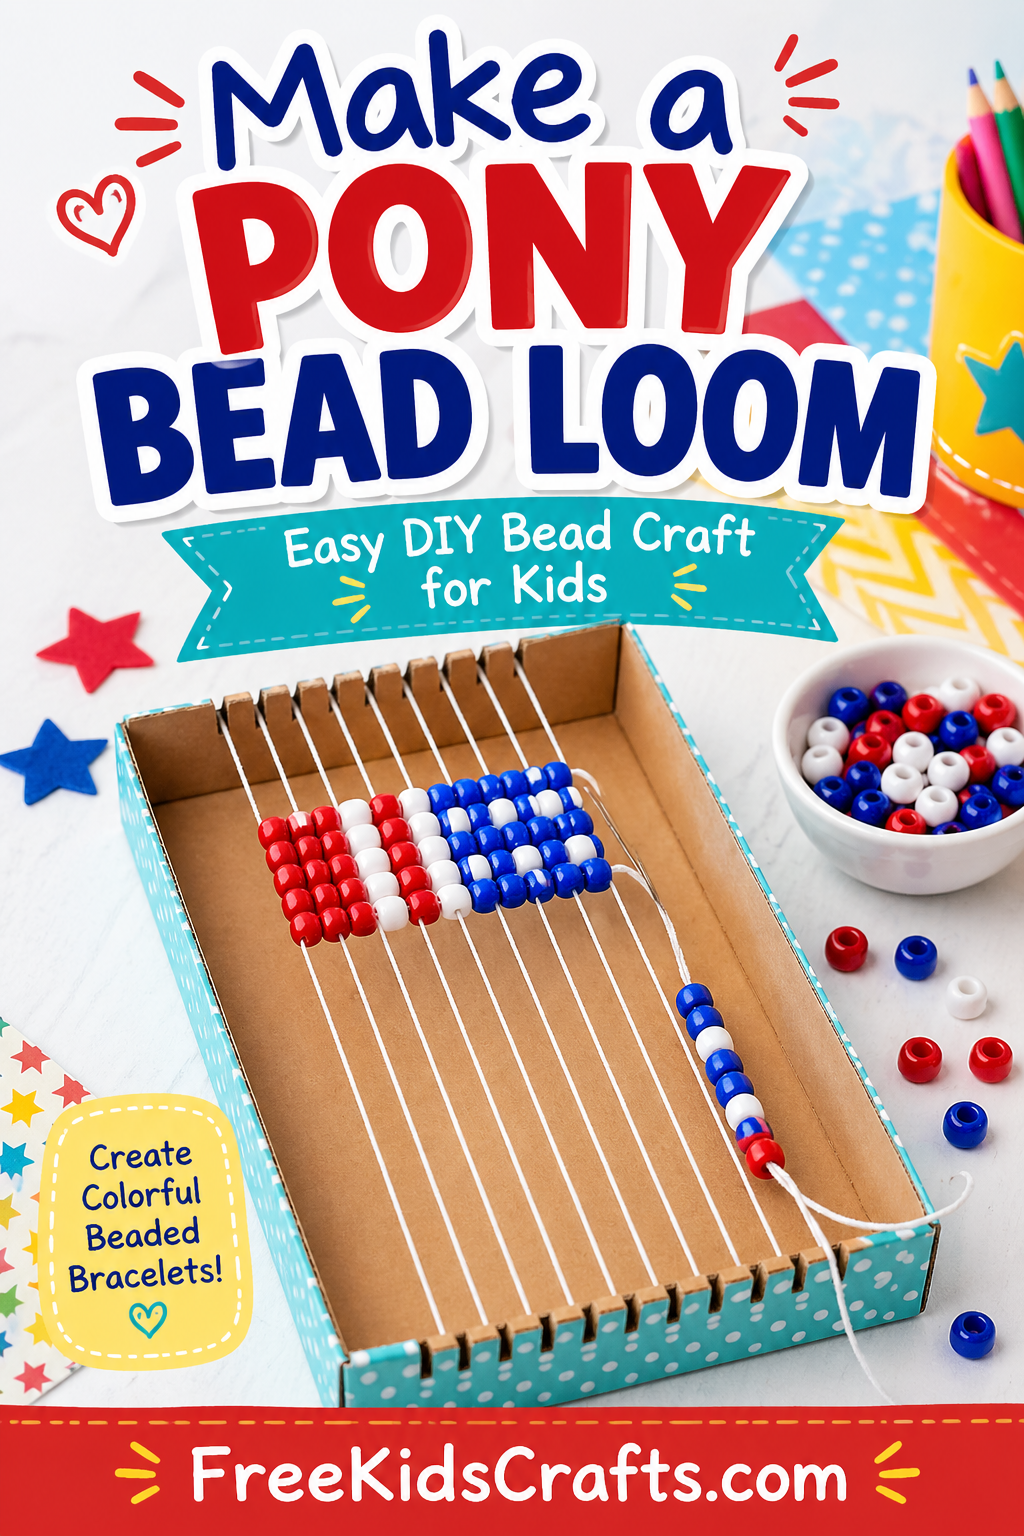
Make A Pony Bead Loom
This easy pony bead loom is a fun homemade craft tool kids can use again and again. With a simple shoe box lid, heavy thread, and tape, kids can create their own bead loom and use it to make colorful pony bead patterns. This is a great craft for camp, rainy days, classroom activities, or an afternoon of crafting with friends.
Beading is a wonderful hands-on activity that helps kids practice patience, pattern recognition, and fine motor skills while making something they can proudly display or give as a gift.
Fun Fact
People all over the world have used handlooms for thousands of years. Even very simple looms can be used to create beautiful woven designs, patterns, and textiles.
Supplies
- Shoe box lid
- Heavy thread
- Tape
- Ruler
- Serrated knife, adult use only
Instructions
- Use a ruler to mark 1/4 inch increments along both short ends of the shoe box lid.
- Ask an adult to carefully cut a small notch at each mark with a serrated knife.
- Tape the end of the heavy thread to the back of the lid.
- Wrap the thread around to the front of the lid and push it down into the first notch.
- Continue wrapping the thread across the lid, pushing it into the matching notch on the opposite end.
- Wrap the thread around the bottom and up to the next notch.
- Keep wrapping until your loom has one more thread than the number of bead rows in your pattern.
- Your pony bead loom is now ready to use.


Using Your Pony Bead Loom
Once your loom is finished, kids can use it to create pony bead designs from printable templates or their own patterns.
Supplies for Beading
- Pony bead loom
- Pony bead pattern
- Pony beads
- Rat-tail satin cord
- Tacky glue
- Scissors
Instructions for Beading
- Print the flag pattern from the Patterns, Templates and Printables section, or choose another pony bead pattern.
- Dip one end of the satin cord into tacky glue.
- Spread the glue with your fingers over the last 4 inches of the cord.
- Let the glue dry completely. This will make the cord stiff and easier to weave through the beads.
- Tie the other end of the cord to the top of the last loom thread.
- String the first row of pony beads onto the cord.
- Bring the string of beads under the wrapped loom threads.
- Hold the cord snugly against the threads, fitting each bead between two threads.
- Thread the cord back through the beads, this time passing over the loom threads.
- Pull the cord all the way through so the row of beads is securely anchored.
- Continue following your pattern, weaving each row of beads snugly against the row before it.
- When your design is finished, tie the cord to the last loom thread.
- Cut the anchoring threads from the loom.
- Tie the loose thread ends together in pairs close to the beads.
- Add a small dab of tacky glue to each knot.
- When the glue is dry, trim the extra thread close to the knots.
Tips for Success
- Start with a simple pony bead pattern before trying larger designs.
- Sort beads by color before beginning so kids can follow the pattern more easily.
- Keep the beads snug against each row, but do not pull so tightly that the loom bends.
- Save the shoe box lid loom so kids can use it for more bead craft projects.
Patterns, Templates and Printables
Click on a pattern to open it in a new window to print.

Teacher Friendly Educational Extension
This pony bead loom activity is a great way to connect crafting with math and history. Have students look at the bead pattern as a grid and count how many beads are needed in each row. Older kids can design their own patterns on graph paper before weaving.
For a social studies connection, talk about how different cultures have used looms to make clothing, blankets, rugs, and decorative textiles. Students can compare simple handlooms with larger traditional looms and discuss how patterns, colors, and symbols can tell a story.
This also makes a fun classroom activity for practicing repeated patterns, symmetry, counting, and fine motor skills.
Supplies
Instructions
Patterns, Templates and Printables
Click on a pattern to open it in a new window
Other Images
Click on an image to open it in a new window

Contributor
Terri is the creator of makingfriends.com, freekidscrafts.com, scoutswaps.com and badginabag.com. Her work is republished all over the internet and is considered the queen of kids crafts.