Marbleized Nail Polish Flower Pot
Mother’s Day is a wonderful time to make something pretty and handmade for Mom or Grandma. This Marbleized Nail Polish Flower Pot is an easy craft for kids and turns a simple white plastic cup into a colorful little planter. It is a fun way to recycle party cups into something useful and beautiful.
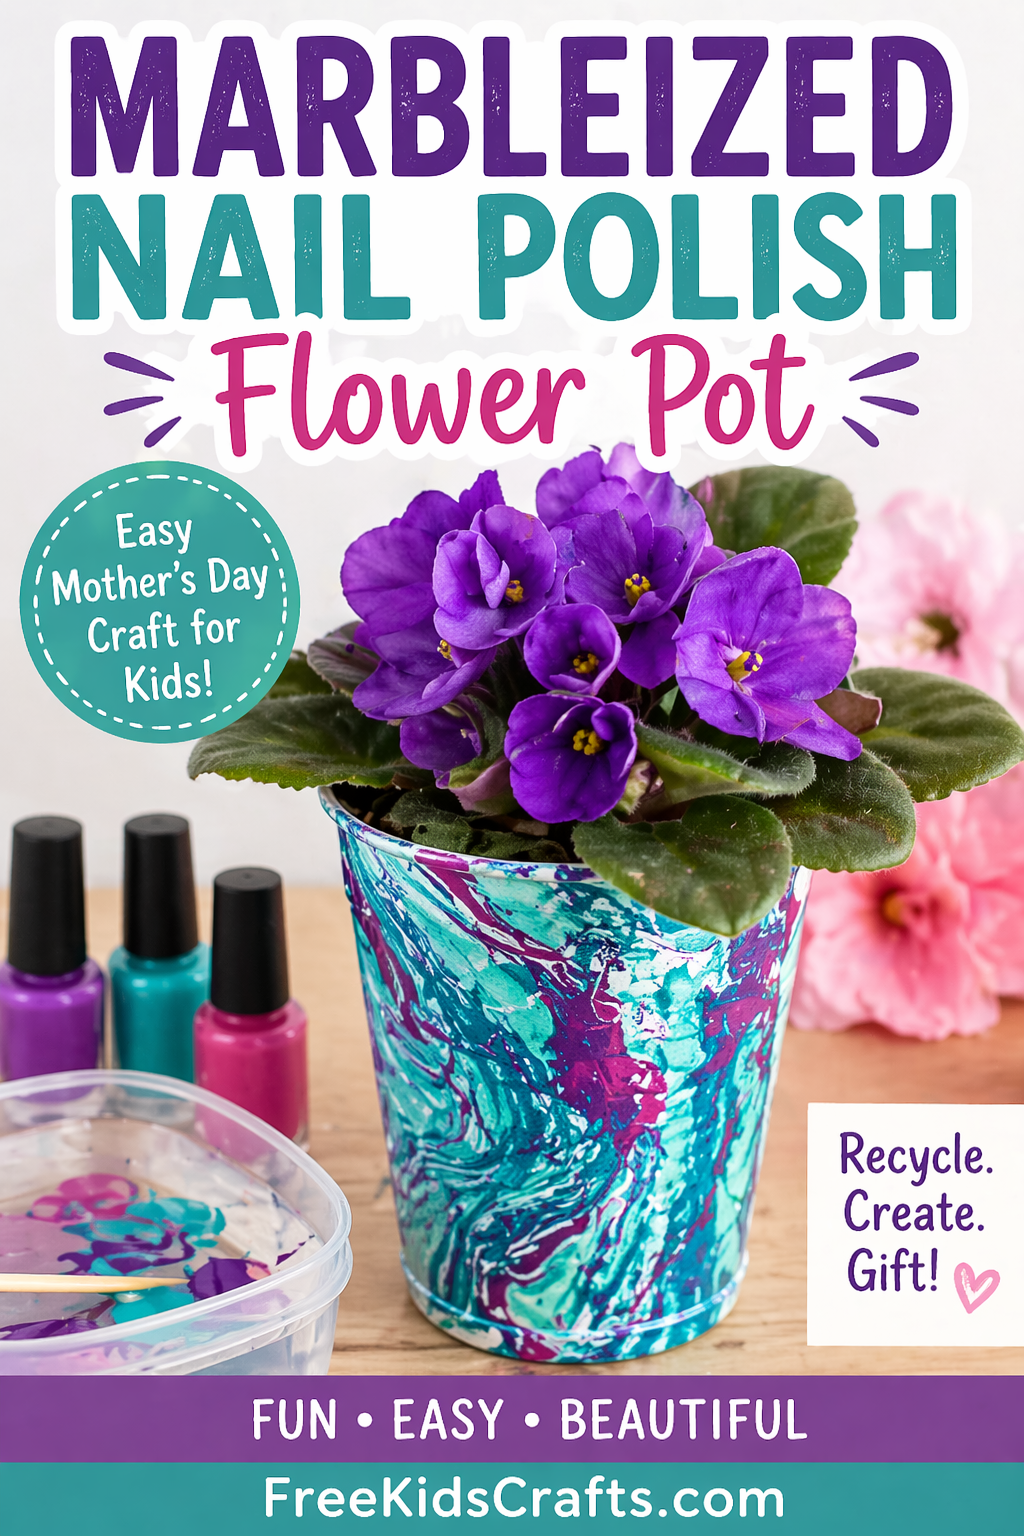
This flower pot works well for a small potted flower, or you can fill it with soil and plant seeds to grow later.
Supplies
- White plastic cup
- Medium disposable container
- Warm water
- Nail polish in assorted colors
- Toothpick or wooden skewer
- Latex gloves
- Newspaper
- Small potted flower or flower seeds
- Potting soil
Instructions
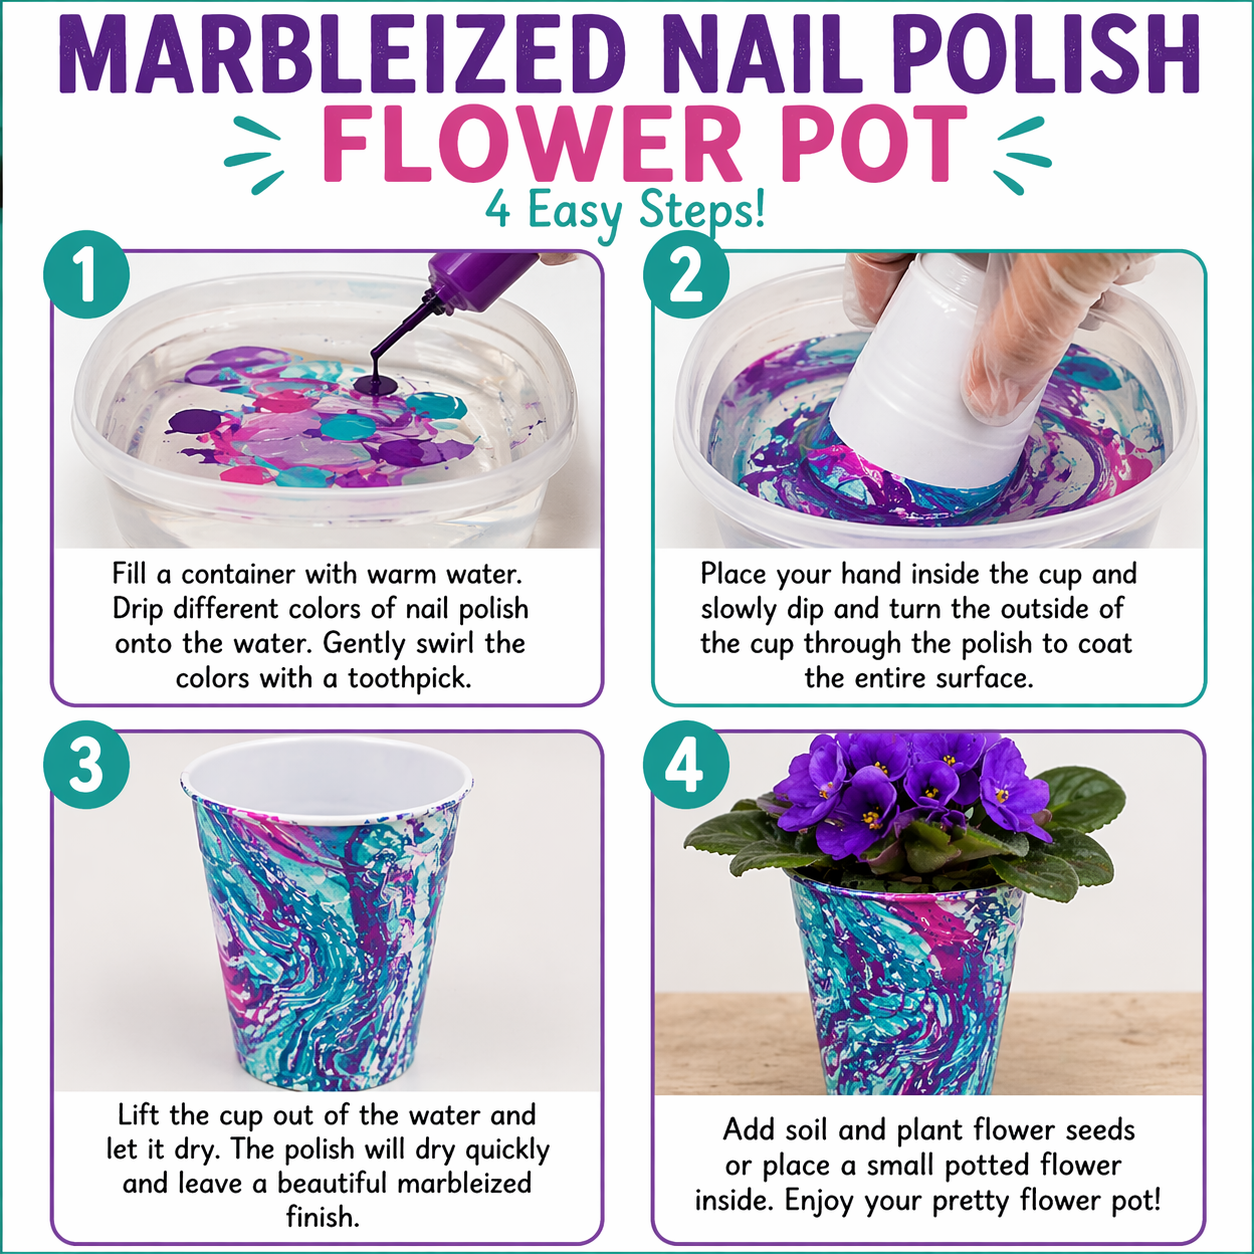
- Cover your work surface with newspaper.
- Put on gloves to protect your hands.
- Fill the disposable container about halfway with warm water.
- Drip a few colors of nail polish onto the surface of the water. Gently swirl the colors with a toothpick or skewer to make a marble pattern.
- Place your hand inside the cup and slowly dip and turn the outside of the cup through the polish design so the surface gets coated.
- Lift the cup out of the water. The polish should dry very quickly and leave a pretty marbleized finish.
- Let the cup dry fully before adding soil or placing a small potted plant inside.
- Add a violet, another small flower, or plant flower seeds in soil so kids can watch them grow and bloom.
Tips
- This technique can be used on other craft surfaces too, so it is a fun one to try on different projects.
- We found that very inexpensive nail polish did not work as well for this craft. Slightly thicker or better quality polish usually gives a prettier marble effect.
- Adult help is a good idea when working with nail polish, and this project should be done in a well-ventilated area.
Fun Facts
- Marbling is an art technique that creates swirled patterns that look a little different every time.
- No two marbleized flower pots will turn out exactly alike, which makes each one special.
- A small handmade flower pot makes a sweet Mother’s Day gift, teacher gift, or spring classroom activity.
Teacher Friendly Educational Extension
Turn this craft into a simple art lesson by talking about marbling and color mixing. Children can predict what will happen when different colors are swirled together, then compare the final results on each cup.
This activity also works well as a recycling lesson. Talk about how an everyday plastic cup can be reused and turned into something decorative and useful instead of being thrown away.
For a science extension, plant flower seeds in the finished cup and have children observe how long it takes for the seeds to sprout and grow.
Supplies
White Plastic Cup
Medium Sized Disposeable Container
Warm Water
Nail Polish (various colors)
Toothpick or Skewer
Latex Gloves
Newspaper
Seeds or potted plant
Dirt
Instructions
Cover your work area with newspapers.
Put on gloves.
Fill your container half full with room temperature water.
Dribble various colors of nail polish into the water and gently swirl with a toothpick or skewer.
With your hand inside the cup turn it so that the entire surface has been coated with polish.
Lift the cup out and it dries instantly into this beautiful marbelized finish.
We selected a potted violet for our project but you can fill the cup with dirt and plant flower seeds that are fun to watch as they grow and bloom.
Editor's Note: This is a fun technique to use on all kinds of projects.
We found that the really cheap nail polish did not work as well on this project.
Contributor

These projects are created by Terri, Betty, Jamie or one of the talented staff members at MakingFriends.com. They have been created exclusively for publication on FreeKidsCrafts.com with supplies you'll be able to find around your house.


I like it a lot, n l hope to have fun with my family! Thanks!!