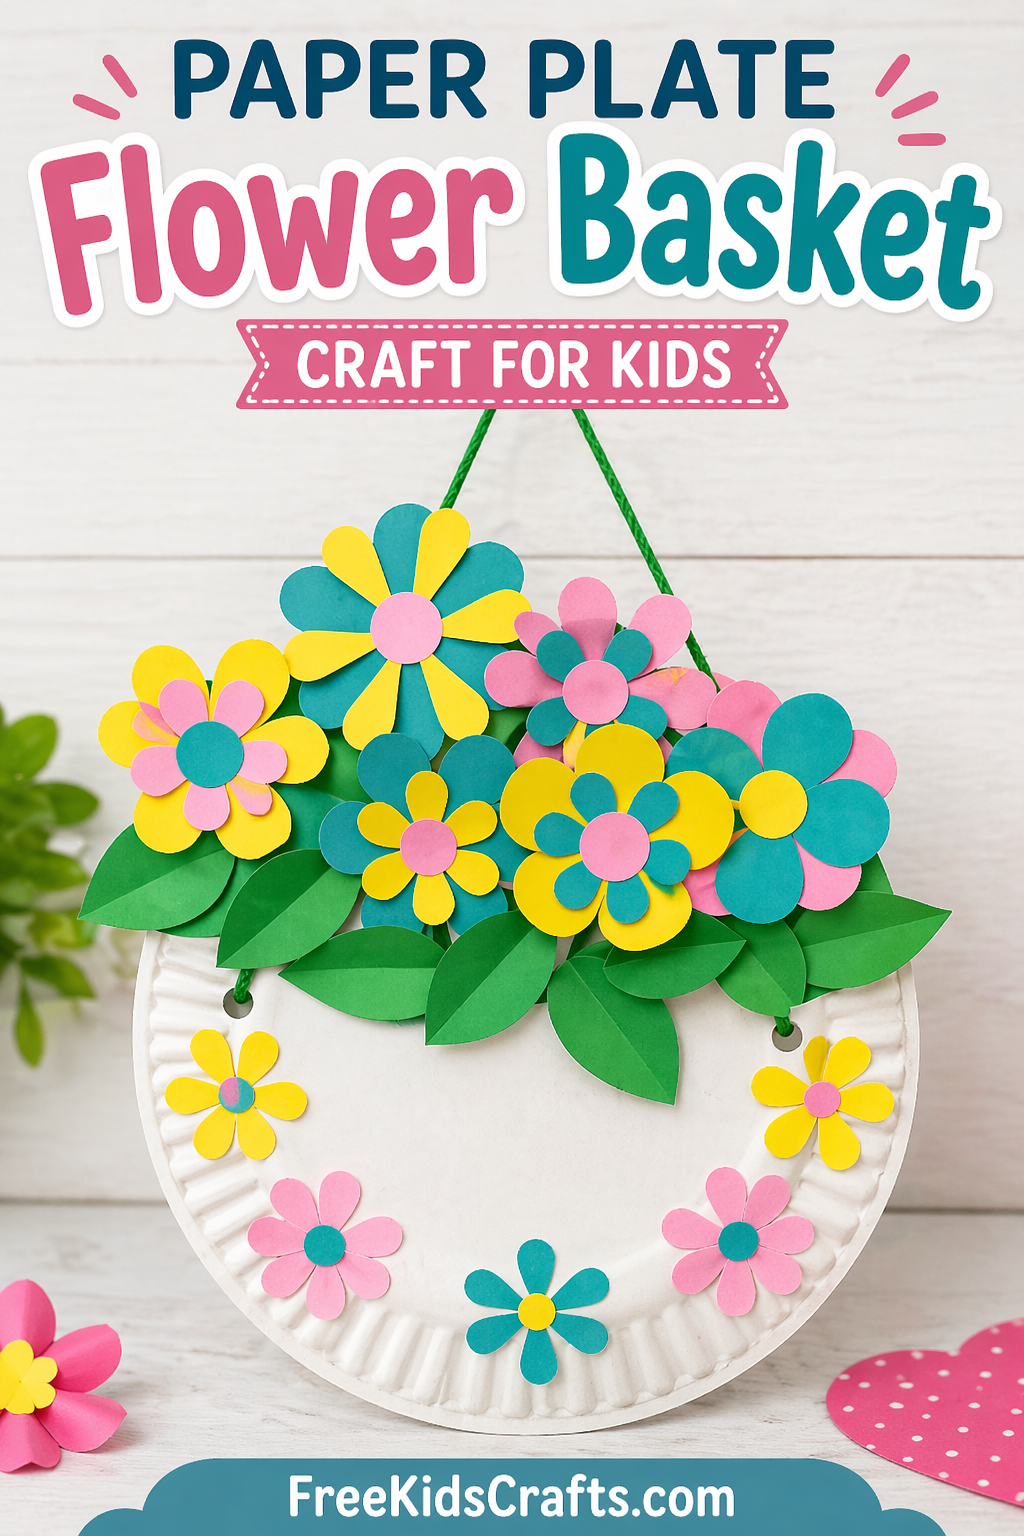
Paper Plate Flower Basket Craft
It is springtime, and Mother’s Day is almost here. This Paper Plate Flower Basket Craft is a cheerful project for kids to make at home or in the classroom. Hang it on a door, display it on a wall, or give it to Mom as a sweet handmade gift. This is an easy craft for kids that turns simple supplies into a bright flower basket full of color.
Supplies
- Two paper plates
- Flower templates printed on teal paper
- Flower templates printed on pink paper
- Flower templates printed on yellow paper
- Leaf templates printed on green paper
- String for hanging
- Six pipe cleaners
- Tacky glue
- Scissors
- Hole punch
Instructions
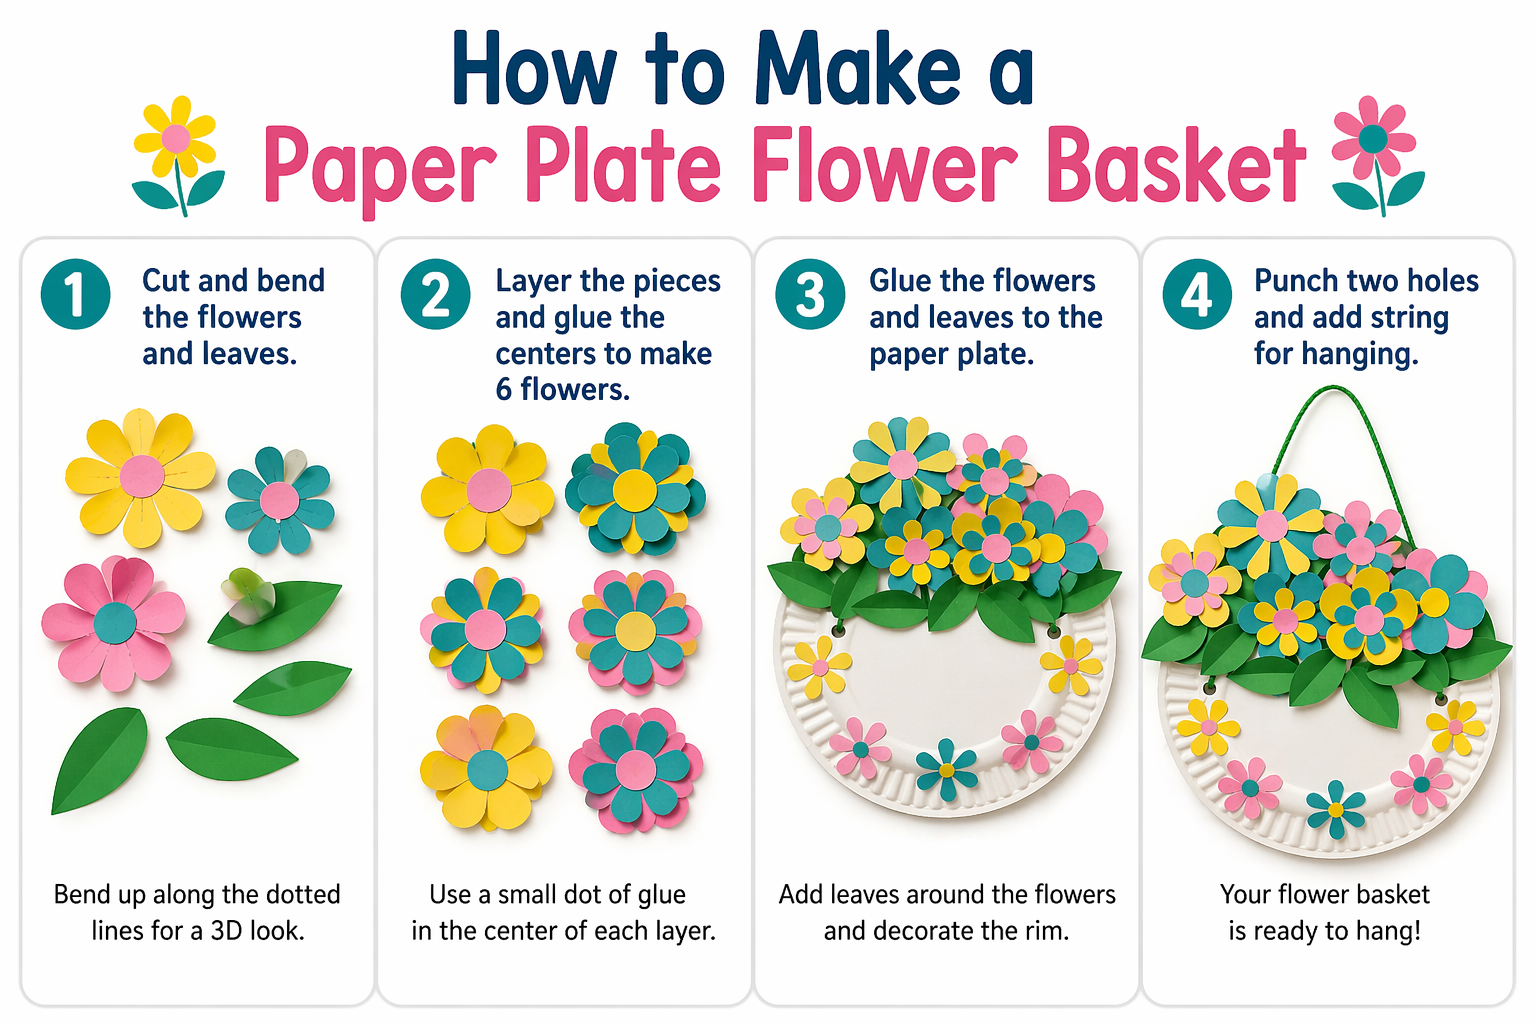
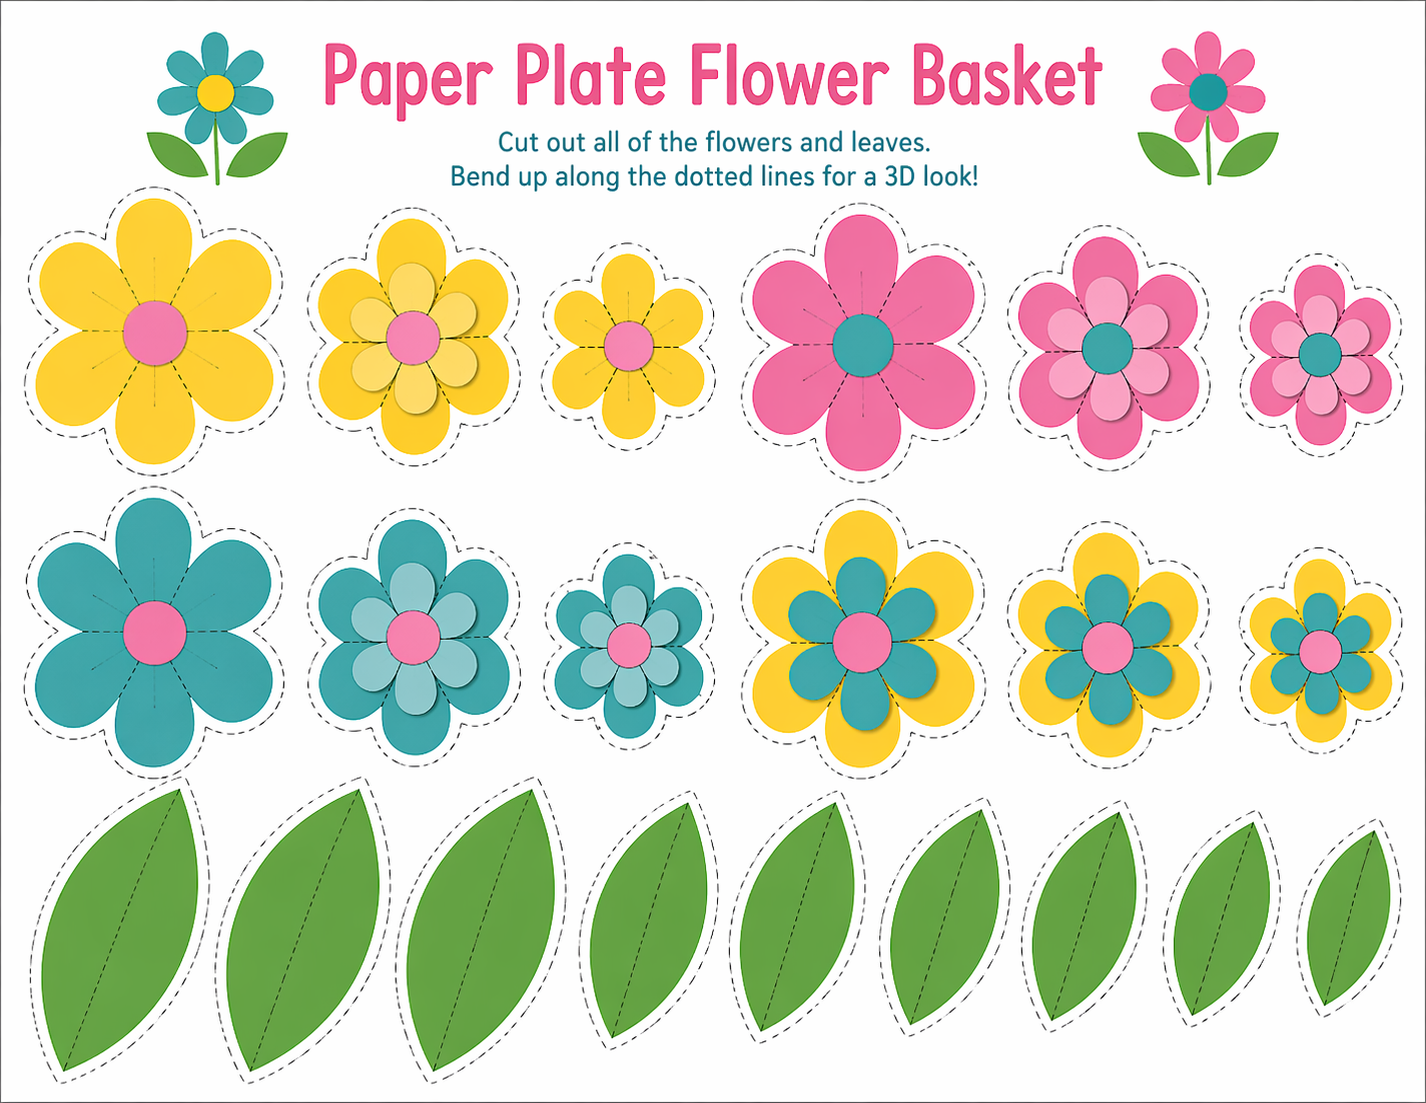
- Print the flower pieces on three different colors of paper. You can use teal, pink, and yellow, or choose any colors you like.
- Print the leaves on green paper and cut out all flower and leaf pieces. The printed side will become the back side of the flowers and leaves.
- Gently bend the flower petals and leaves up along the dotted lines. This helps give the paper flowers a more layered and dimensional look.
- Assemble six flowers by layering the pieces together. Use a small dot of tacky glue in the center of each layer to hold the flower together.
- Glue the finished flowers onto one paper plate, using the project photo as a guide if needed. Add the leaves around the flowers to make the basket look full.
- Use the smaller and simpler flower pieces to decorate the rim of the paper plate basket.
- Punch two holes near the upper third of the paper plate. Tie a piece of string through the holes so the basket can be hung for display.
Fun Facts
Many words for mother around the world begin with an M sound. One reason may be that “ma” is one of the earliest sounds babies can make, which is why similar words for mother appear in many languages.
Patterns, Templates and Printables
Click on a pattern to open it in a new window to print.


Teacher Friendly Educational Extension
This Mother’s Day craft works well as a classroom activity during spring. Students can practice fine motor skills by cutting, bending, layering, and gluing the flower pieces. Teachers can also turn this into a writing activity by asking children to add a short note on the back of the basket about why their mom, grandma, or another special caregiver is important to them.
For a simple math extension, have students count petals, sort flowers by color, or create repeating color patterns with the layered flower pieces.
Supplies
Two Paper Plates
Flowers Printed on Teal Paper
Flowers Printed on Pink Paper
Flowers Printed on Yellow Paper
Leaves Printed on Green Paper
String for Hanging
Six Pipe Cleaners
Tacky Glue
Scissors
Hole Punch
Instructions
Print and cut out flowers in three different colors, you can use our suggestions or make up your own combinations.
Print and cut out green leaves. Printed side will be the back of the flowers and leaves.
Bend pieces up slightly on the dotted lines. This will make the flowers more interesting.
Using the picture as a reference, assemble six flowers by layering pieces and glue to the paper plate.
Use a small dot of glue in the center of each piece to secure.
Decorate the rim of your paper plate with simpler flowers.
Punch two holes in the upper third of the paper plate and add string for hanging.
Patterns, Templates and Printables
Click on a pattern to open it in a new window


Contributor

These projects are created by Terri, Betty, Jamie or one of the talented staff members at MakingFriends.com. They have been created exclusively for publication on FreeKidsCrafts.com with supplies you'll be able to find around your house.


This is so cute! Do you have a printable pattern for the flowers?
Here you go. Ihad forgotten to post them
Betty, can I have the templates also? Your listing sends me to and advertisement….. 🙂 Thank you!!
Click on the drawings below the picture for the templates for the flowers and the leaves.
What do you use the pipe cleaners for? Are they stems to be poked into the paper plate and secured on the back?
Yes