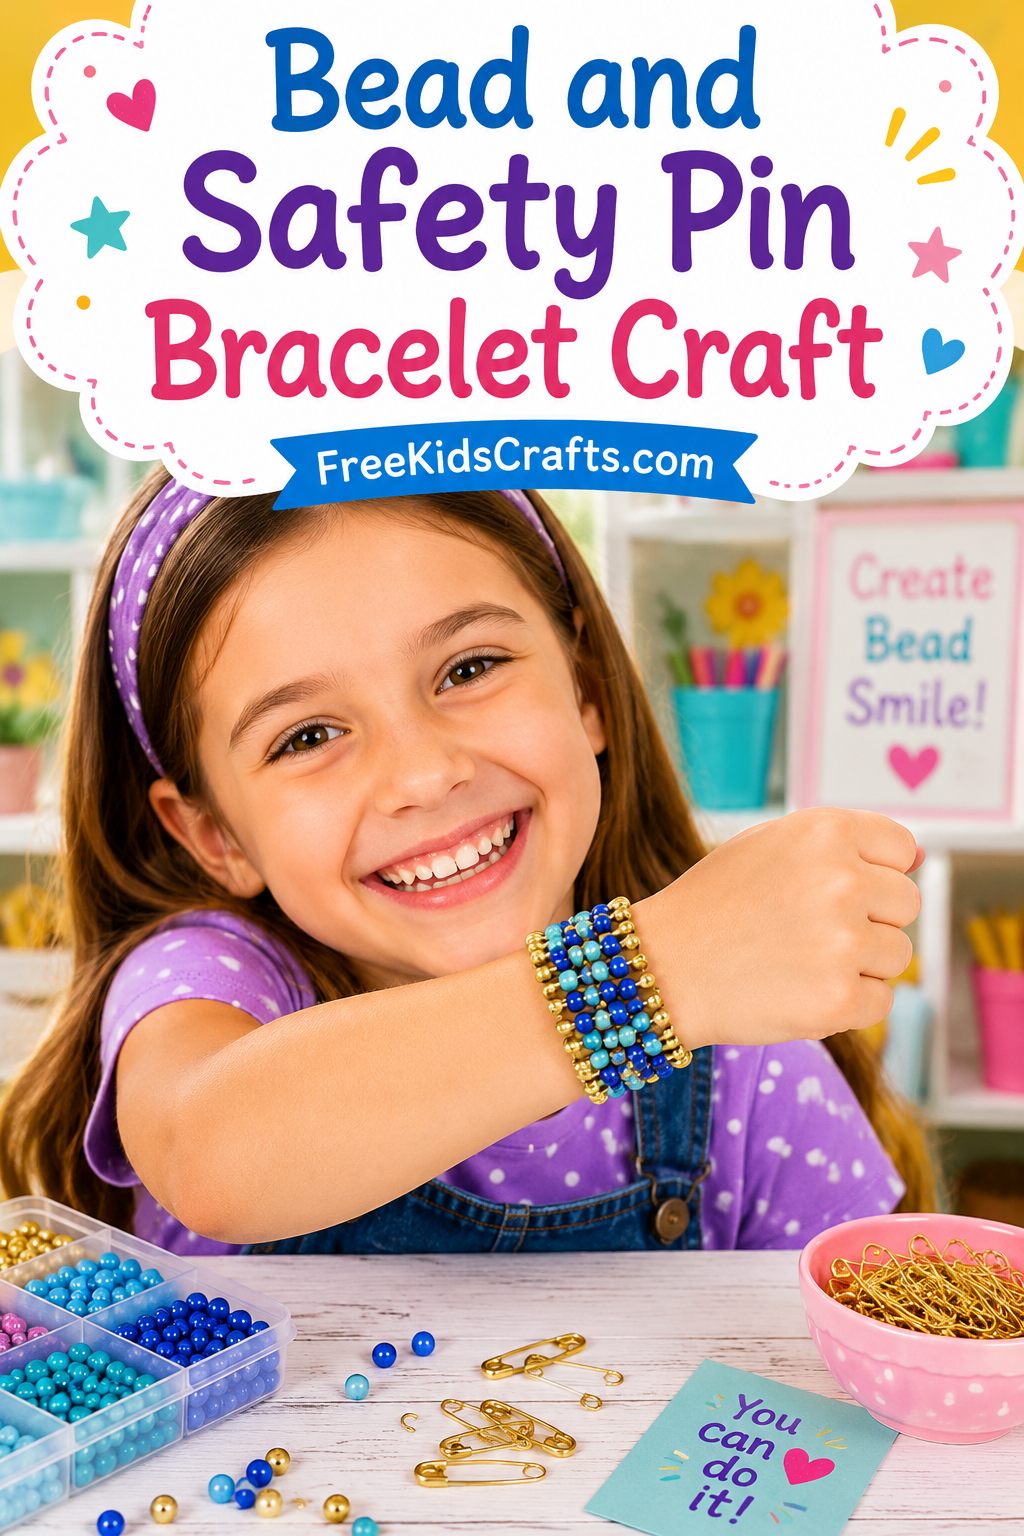
Bead and Safety Pin Bracelet Craft
Make a colorful Bead and Safety Pin Bracelet and start a fun new jewelry trend. Kids can design their own pattern with favorite bead colors, then make extras to share as handmade gifts for friends. This easy bead craft is a great project for older kids who enjoy creating wearable art.
Fun Fact
The safety pin was patented by Walter Hunt on April 10, 1849. He sold the rights to his invention for $400, but the simple design went on to become a very useful everyday item.
Supplies
- About 50 gold safety pins, size 0
- E-beads
- Gold 4mm round beads
- Beading elastic
- Needle nose pliers
Instructions
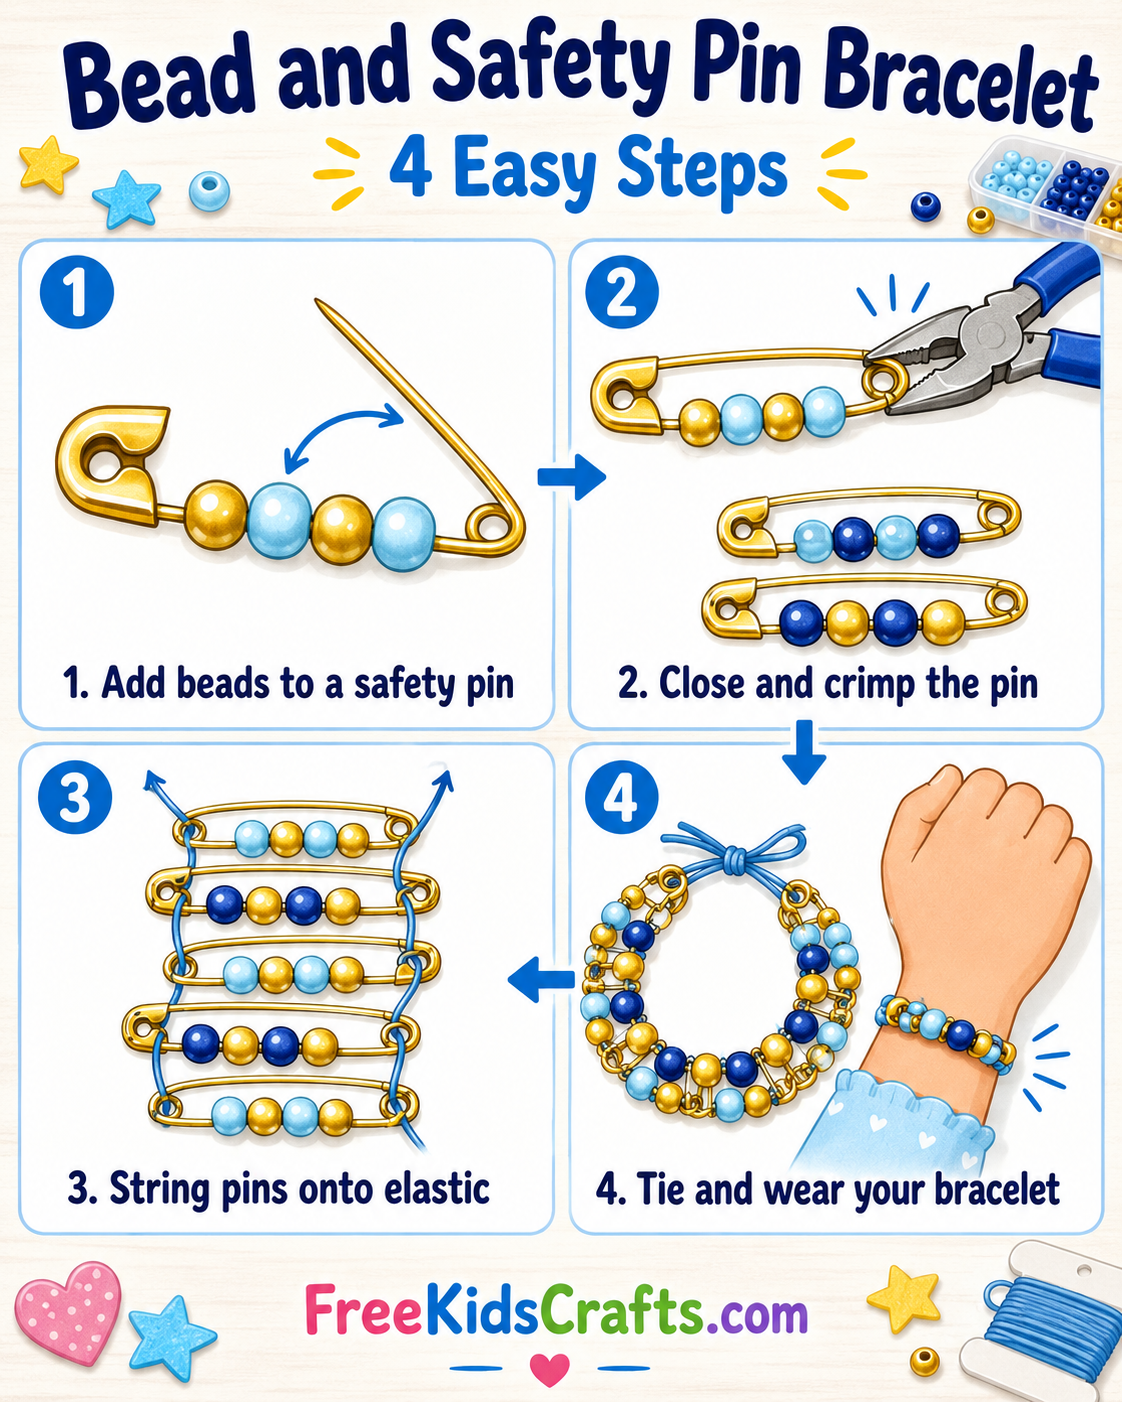
- Open one safety pin and add one gold bead, one light blue e-bead, one gold bead, and one more light blue e-bead. Close the pin.
- Use needle nose pliers to carefully crimp the head of the safety pin so it stays closed permanently.
- Make 25 pins with light blue beads and 25 pins with dark blue beads. You can also use any color pattern you like.
- Cut a 2-foot piece of beading elastic and fold it in half.
- Thread one end of the elastic through the coil of the first safety pin and the other end through the head of the same pin.
- Add the next safety pin facing the opposite direction. Continue stringing the pins, alternating the direction as you go.
- String four pins of one bead color, then four pins of the other bead color. Continue until all pins are added. You may need a few more or fewer pins depending on wrist size.
- Slide the pins away from the folded end of the elastic. Cut the elastic at the fold.
- Bring the pins together to form a bracelet loop. Tie the elastic ends securely and trim off the extra elastic.
Craft Tips
Adult supervision is recommended when working with safety pins and needle nose pliers.
Try school colors, holiday colors, rainbow beads, or favorite team colors to make each bracelet unique.
For smaller wrists, use fewer pins. For larger wrists, add a few extra pins before tying the bracelet closed.
Patterns, Templates and Printables
No printable pattern is needed for this craft. Kids can create their own bead pattern using safety pins, e-beads, round beads, and beading elastic.
Teacher Friendly Educational Extension
This bead and safety pin bracelet craft can become a simple classroom activity about patterns, design, and sequencing. Ask kids to create repeating color patterns, such as blue, gold, blue, gold, or groups of four like the sample bracelet.
Older students can count the total number of beads used, estimate bracelet length, or compare how the bracelet size changes when pins are added or removed. This also makes a fun handmade gift project for friendship themes, holiday crafts, or classroom craft days.
Supplies
Instructions
Open up a safety pin and string on one gold bead, one light blue e-bead, one gold bead, and one more light blue e-bead. Close the pin and use a needle nose pliers to crimp the head to keep it closed permanently. Make a total of 25 pins with the light blue beads and 25 pins with the dark blue beads.
Cut a 2' piece of beading elastic. Fold in half. String the first pin by threading one end of the elastic through the coil of the pin and the other end through the head of the pin. String the next pin with the head pointing in the other direction. Continue stringing, alternating the direction of the pins. Sting four of one color, then four of the other color.
String all 50 pins -- actual number may very due to wrist size. Slide pins away from the fold of the elastic. Cut the elastic at the fol. Bring pins together to form into a loop. Tie off ends. Trim.