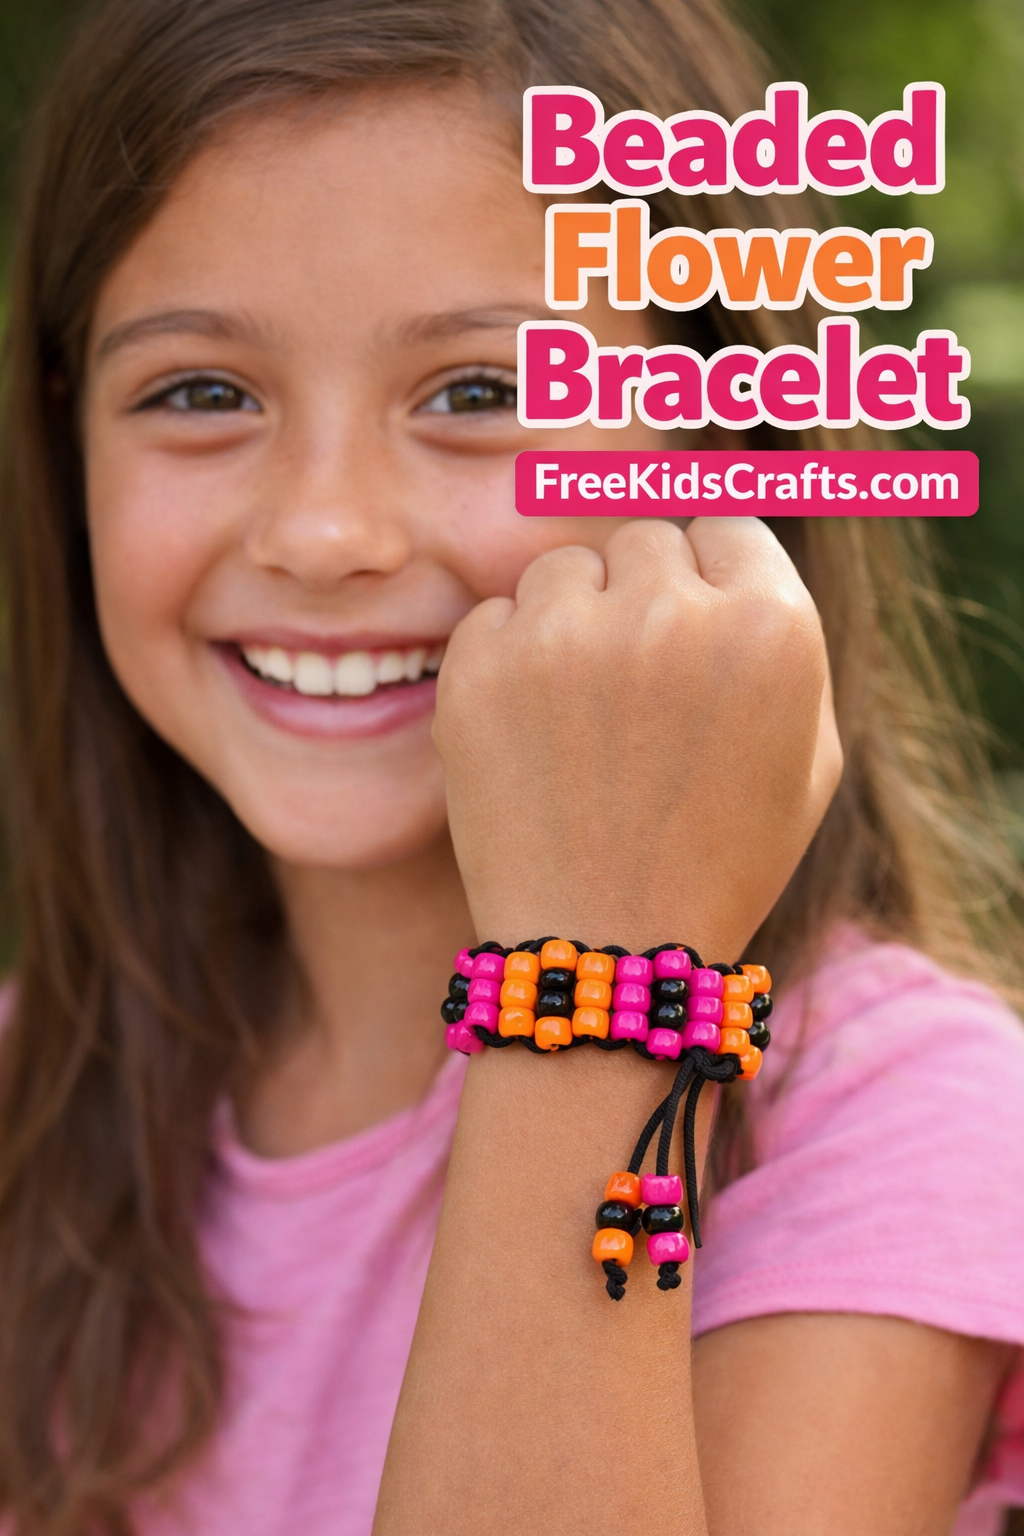
Beaded Flower Bracelet
A Beaded Flower Bracelet is a fun and colorful jewelry craft that kids will love making and wearing. This simple beading project is a great activity for a sleepover, birthday party, scout meeting, or rainy afternoon at home. Make one for yourself or create a few to share with friends.
Supplies
- 26 bright pink pony beads
- 26 bright orange pony beads
- 14 black pony beads
- 2 yards of satin cord
- Craft glue
- Scissors
Instructions
- Cut a 2 yard piece of satin cord.
- Stiffen both ends of the cord with a little craft glue and let them dry. This will make it easier to slide the beads on.
- Find the center of the cord.
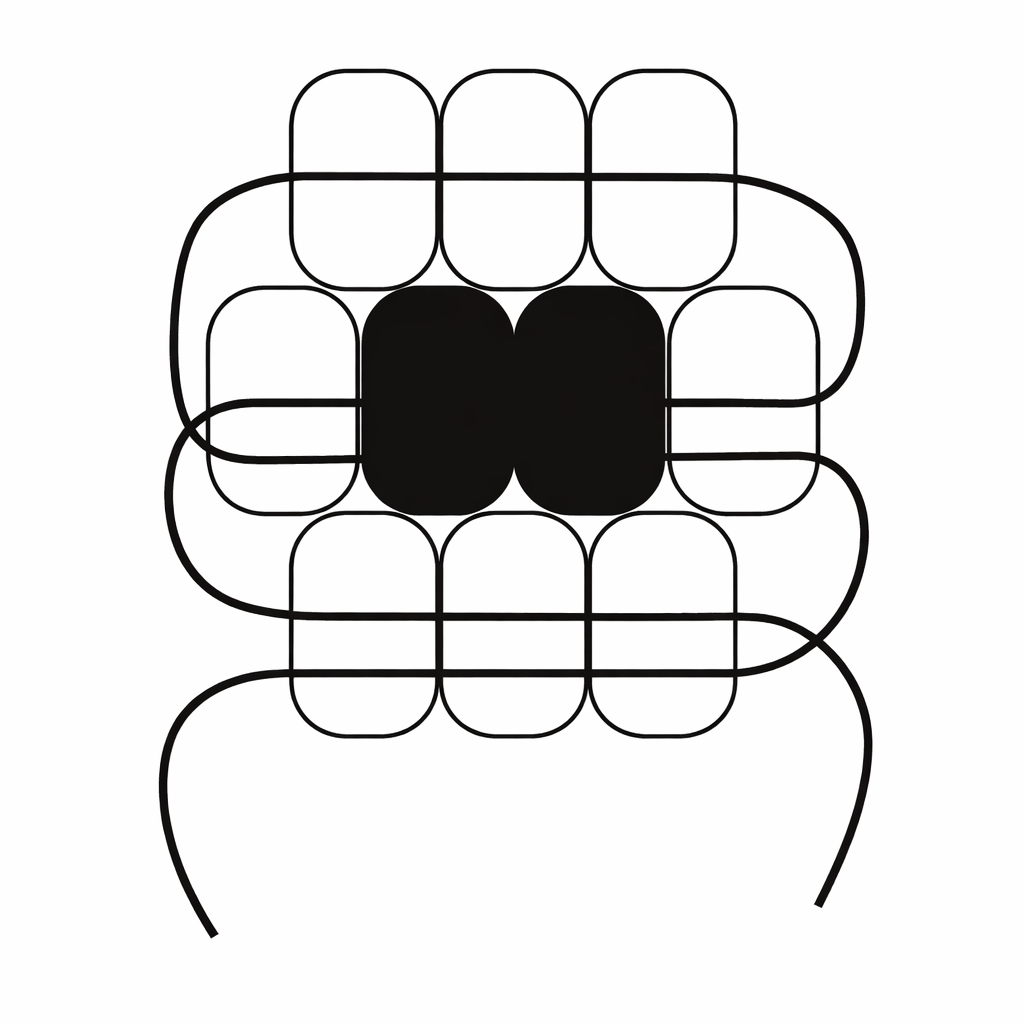
- For the first row of the first flower, slide 3 orange pony beads to the middle of the cord.
- For the second row, string 1 orange bead, 2 black beads, and 1 orange bead onto the right side of the cord.
- Take the left side of the cord and thread it back through those 4 beads in the opposite direction. Pull both ends snug.
- For the third row, string 3 orange pony beads onto the right side of the cord.
- Thread the left side of the cord back through those 3 beads in the opposite direction and pull snug. Your first flower is complete.
- Continue this same pattern to make 6 flowers total, alternating the flower colors between orange and pink.
- Bring the first and last flower together to form a bracelet.
- String one cord end back through the first row of beads so the bracelet can loosen and tighten to fit over the wrist.
- Slide 3 pony beads onto each loose end.
- Tie knots underneath the end beads and trim away any extra cord.
- Slip the bracelet onto your wrist and enjoy your handmade jewelry.
Fun Facts
Bracelets made from reeds, bone, wood, and shells have been been worn by people since ancient times. In ancient Egypt and Babylonia, brides often wore two bracelets, one on each wrist.
Patterns, Templates and Printables
Click on the beading diagram below to follow the bracelet pattern step by step.
Teacher Friendly Educational Extension
This beaded flower bracelet craft works well as a fine motor activity for kids. It also gives children a chance to practice patterns, counting, and color recognition. Try asking kids to create their own repeating bead pattern or estimate how many beads they will need before they begin. This makes a fun addition to classroom activities, summer camps, or homeschool art lessons.
Supplies
26 Bright Pink Pony Beads
26 Bright Orange Pony Beads
14 Black Pony Beads
Two Yards of Satin Cord
Craft Glue
Scissors
Instructions
Stiffen the ends of the cord with craft glue. Let dry.
Click on Printables for a beading diagram.
For the first row of the first flower, string three orange pony beads to the middle of your cord.
For the second row, on the right hand cord string one orange, two black and one orange pony bead.
String the left hand cord through the second row of beads in the opposite direction. Pull snug.
For the third row, string on three orange pony beads on the right hand cord. String the left hand cord through the third row of beads in the opposite direction. Pull snug The flower is complete.
Continue in the manner until you have made six flowers in alternating colors. Loop around, bringing the first and last flowers together. String one cord through the first row. You will be able to loosen and tighten the bracelet to take in on and off.
Slide three pony beads on each end. Knot underneath. Trim.
Slip on your wrist and dazzle your friends.
Patterns, Templates and Printables
Click on a pattern to open it in a new window


Cool ! love it!.It is so easy to make