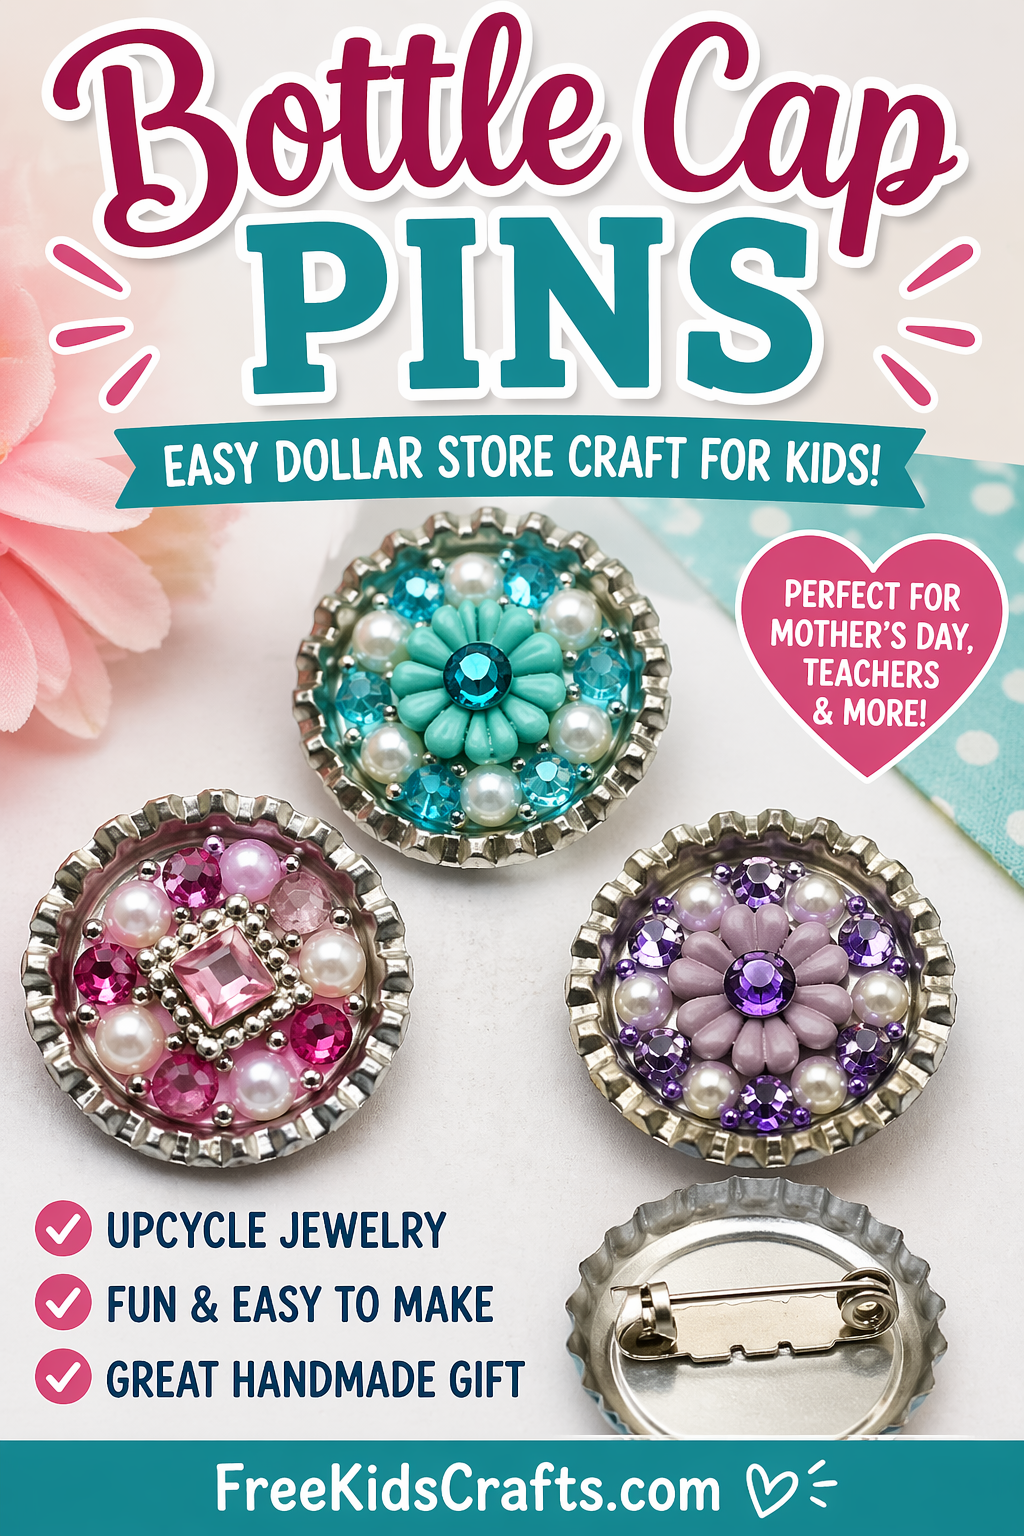
Bottle Cap Pins
Turn simple dollar store jewelry into a sweet handmade gift with these easy Bottle Cap Pins. This is a fun upcycled craft for kids to make for Mother’s Day, teacher gifts, or just because. One inexpensive bracelet can become several pretty little pins, and every design can be unique.
Supplies
- Dollar store bracelet
- Large bottle cap
- Craft pin back
- Hot glue
- Adult help for gluing
Instructions
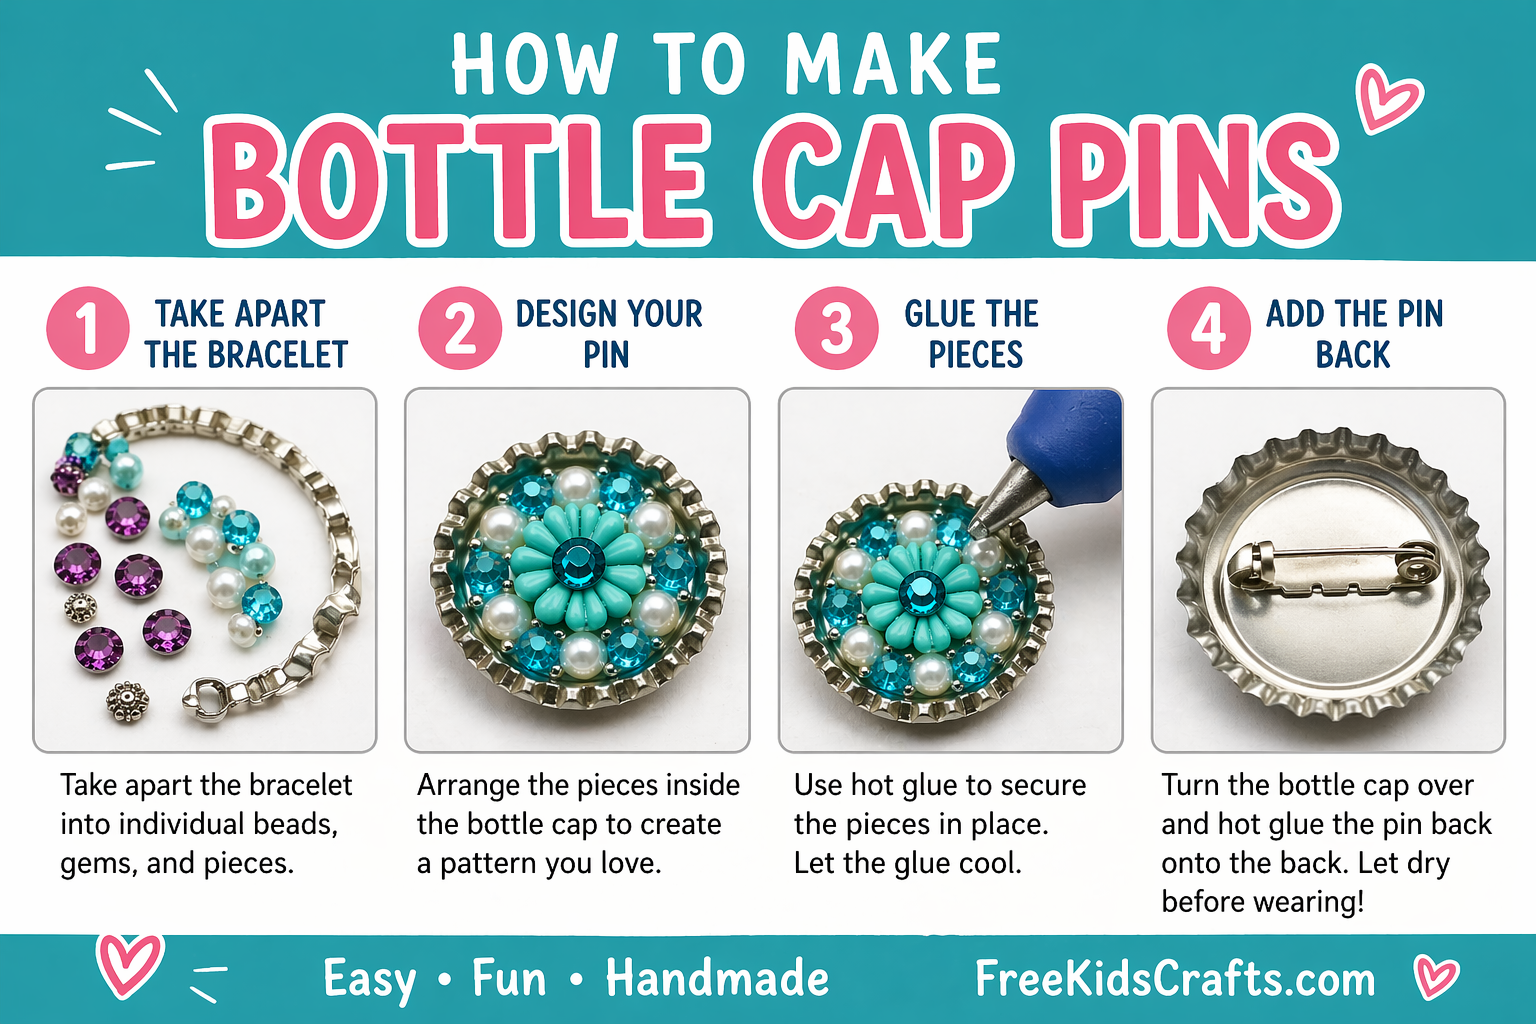
- Take apart the bracelet so you have all the beads, gems, and decorative pieces separated.
- Set a large bottle cap on your work surface and arrange the pieces inside until you find a design you like. Try different patterns, colors, and layers to make each pin special.
- When you are happy with the design, use hot glue to attach the pieces inside the bottle cap. Let the glue cool completely.
- Turn the bottle cap over and hot glue a craft pin back onto the back. Allow it to dry before wearing or giving as a gift.
Tips
- You may not find the exact same bracelet shown in the original sample, and that is part of the fun. Encourage kids to look for shapes, colors, and sparkly pieces that can be mixed into their own original pin designs.
- Because hot glue gets very hot, an adult should help with this step.
Patterns, Templates and Printables
This craft does not require a printable template, but you could offer a simple circle design sheet with pattern ideas for children who want inspiration before they begin.
Teacher Friendly Educational Extension
This craft is a great way to teach children about recycling and creative reuse. Ask kids to look at everyday objects from a new point of view and think about how they can be turned into something useful or beautiful. This also works well as a classroom activity for Mother’s Day, kindness themes, or handmade gift units.
Supplies
Dollar Store Bracelet
Hot Glue
Craft Pin back
Large Bottle Cap
Instructions
Take apart the bracelet into individual components. Look at them to see how you can repurpose them into a pin. You may not find exactly the same bracelets as we found, so be creative.
Hot glue the beads into a pleasing pattern. Look at the picture and see the different designs we made out of one dollar bracelet.
Hot glue a craft pin to ghe back of the bottle cap and give to someone you love for Mother's Day or any special occasion.
Contributor

These projects are created by Terri, Betty, Jamie or one of the talented staff members at MakingFriends.com. They have been created exclusively for publication on FreeKidsCrafts.com with supplies you'll be able to find around your house.