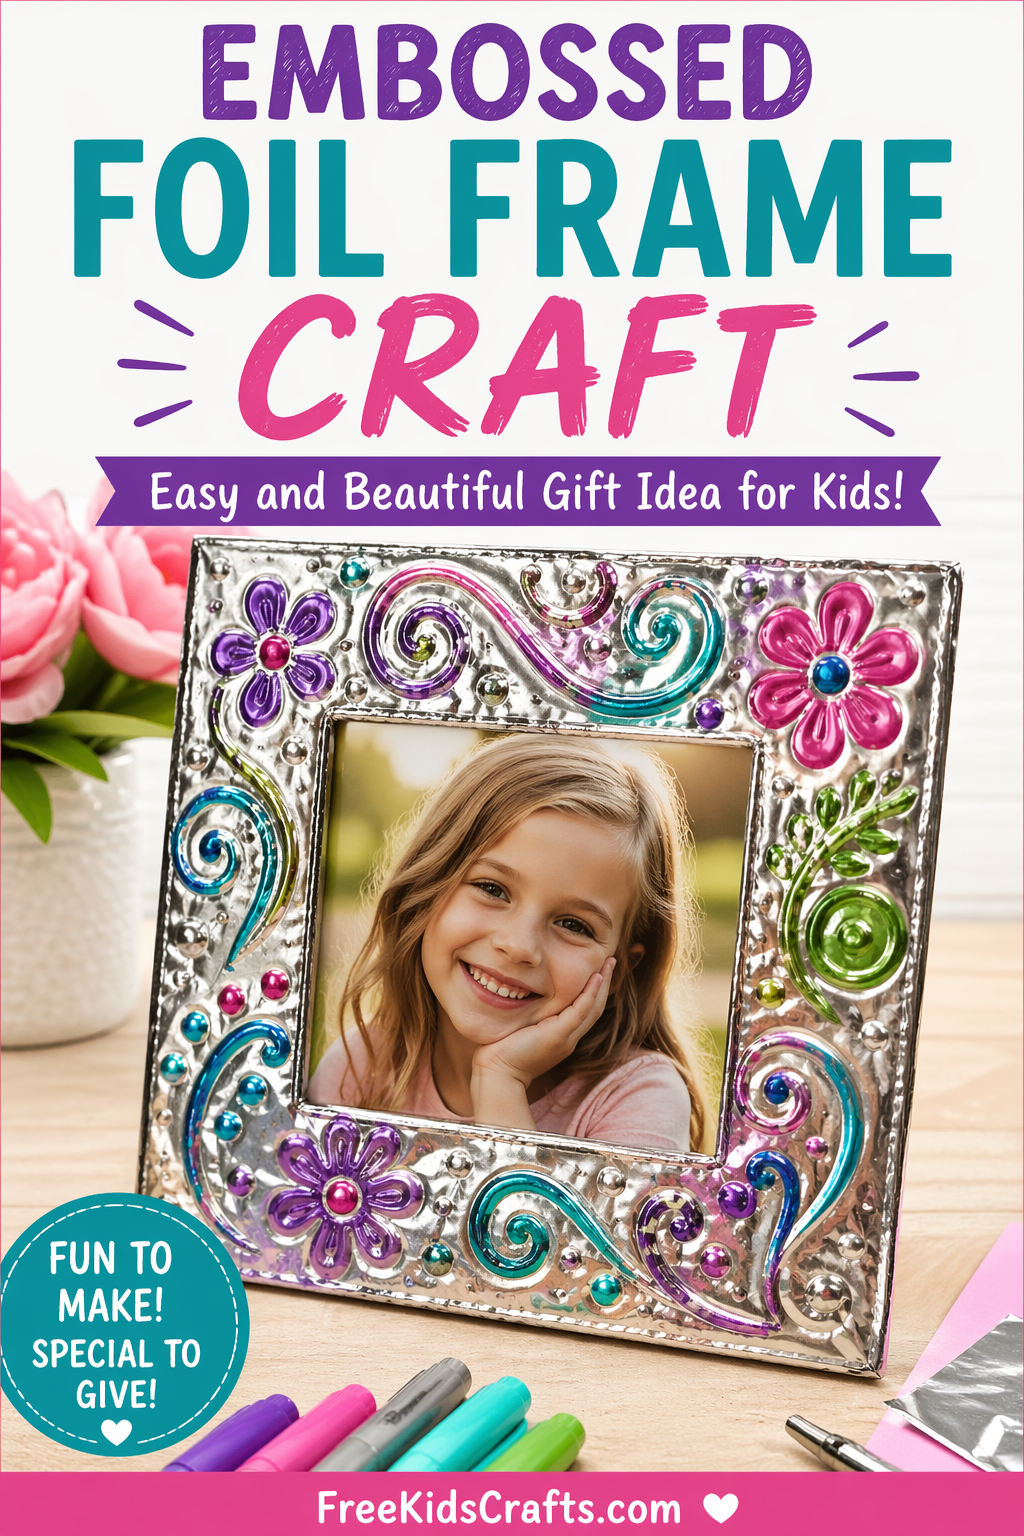
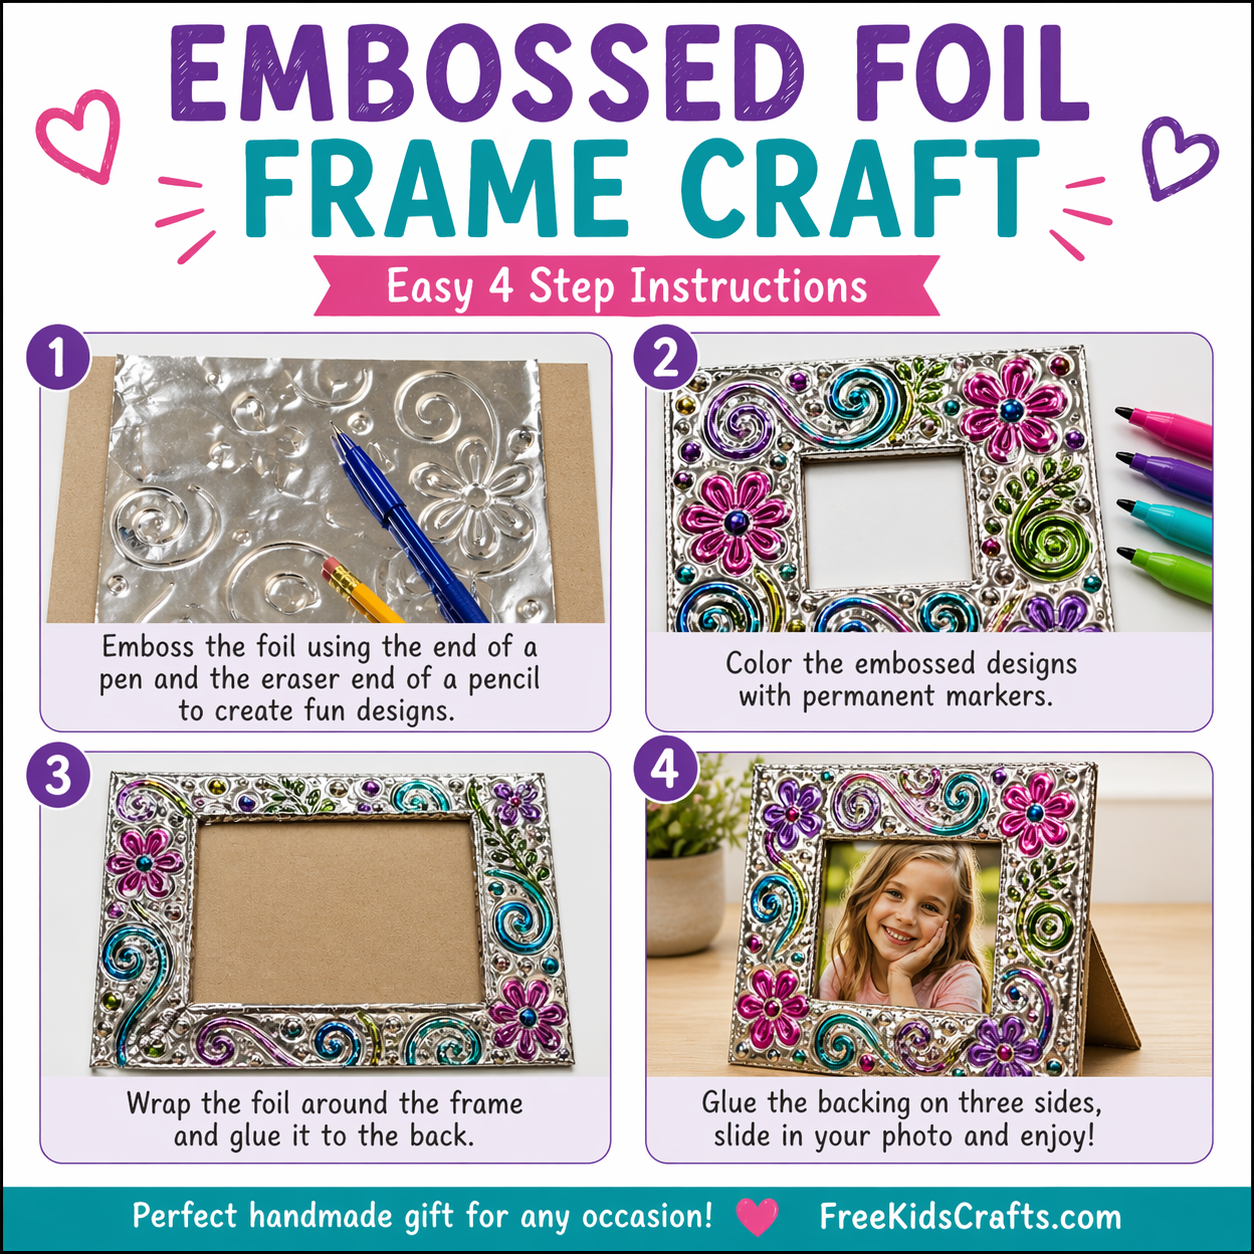
Embossed Foil Frame Craft
Turn a favorite photo into a handmade keepsake with this Embossed Foil Frame Craft. Kids will enjoy pressing patterns into foil, adding bright color, and creating a gift that feels extra special. This is a thoughtful project for Mother’s Day, birthdays, grandparents, or any time you want to make a picture feel even more meaningful.
Fun Facts
One of the earliest photographs to include a human figure was taken by Louis Daguerre in 1838 in Paris, France. Because early cameras needed a very long exposure time, most people moving through the street did not appear in the image.
Supplies
- Heavyweight foil
- Cardboard
- Retractable ballpoint pen
- Pencil with eraser
- Permanent markers
- Scissors
- Soft pad of paper or cardboard
- Hot glue
- Favorite photo
Instructions
- Cut two pieces of cardboard the same size for your frame. One piece will be the backing. The second piece will be the front of the frame. Cut an opening in the front piece large enough to show your photo.
- Place a sheet of foil on top of a soft pad of paper or cardboard. Make sure the foil is larger than your frame so there will be enough to wrap around the edges.
- Use the retracted end of a ballpoint pen, the cap of the pen, and the eraser end of a pencil to press designs into the foil. Create swirls, dots, flowers, zigzags, or any pattern you like. Press firmly, but carefully, so the foil does not tear.
- Color parts of the raised design with permanent markers to make the pattern stand out.
- Lay the decorated foil over the front cardboard frame. Wrap the foil around the outside edges and around the inside opening so the cardboard is covered neatly.
- To make the corners smoother, cut small diagonal slits into the foil at each corner before folding it over the cardboard.
- Glue the foil in place on the back side of the front frame piece.
- Use hot glue sparingly along three edges of the back of the frame. Attach the second piece of cardboard to create a pocket for the picture. Leave the top edge open so the photo can slide in and out.
- Insert your favorite photo into the finished frame.
- To make the frame stand up, glue a tapered strip of cardboard to the back near the top, leaving the bottom free to fold out as a stand.
Patterns, Templates and Printables
This craft does not require a printable template, but you can easily create your own cardboard frame pattern based on the size of the photo you want to display.
Teacher Friendly Educational Extension
This craft is a great way to introduce kids to texture, pattern, and basic design. Encourage children to repeat shapes or lines to create a balanced border. In a classroom, students can add a written paragraph about the person in the photo or create the frame as part of a family history activity. This also works well as a classroom activity for Mother’s Day, Father’s Day, or Grandparents Day.