Shrink Wrap Daisy Pin
This beautiful Shrink Wrap Daisy Pin makes a cheerful handmade gift for Mother’s Day, Cinco de Mayo, spring celebrations, or any time kids want to create something bright and special. Children will love watching the shrink plastic curl, wiggle, and shrink in the oven, while adults can help with the baking step.
Supplies
- Flower patterns
- Printable shrink plastic sheets made for inkjet printers
- Color printer
- Scissors
- Foil-lined baking sheet
- Oven
- Mod Podge Dimensional Magic or clear craft sealer
- Glue dots or craft glue
- Craft pin back
Instructions
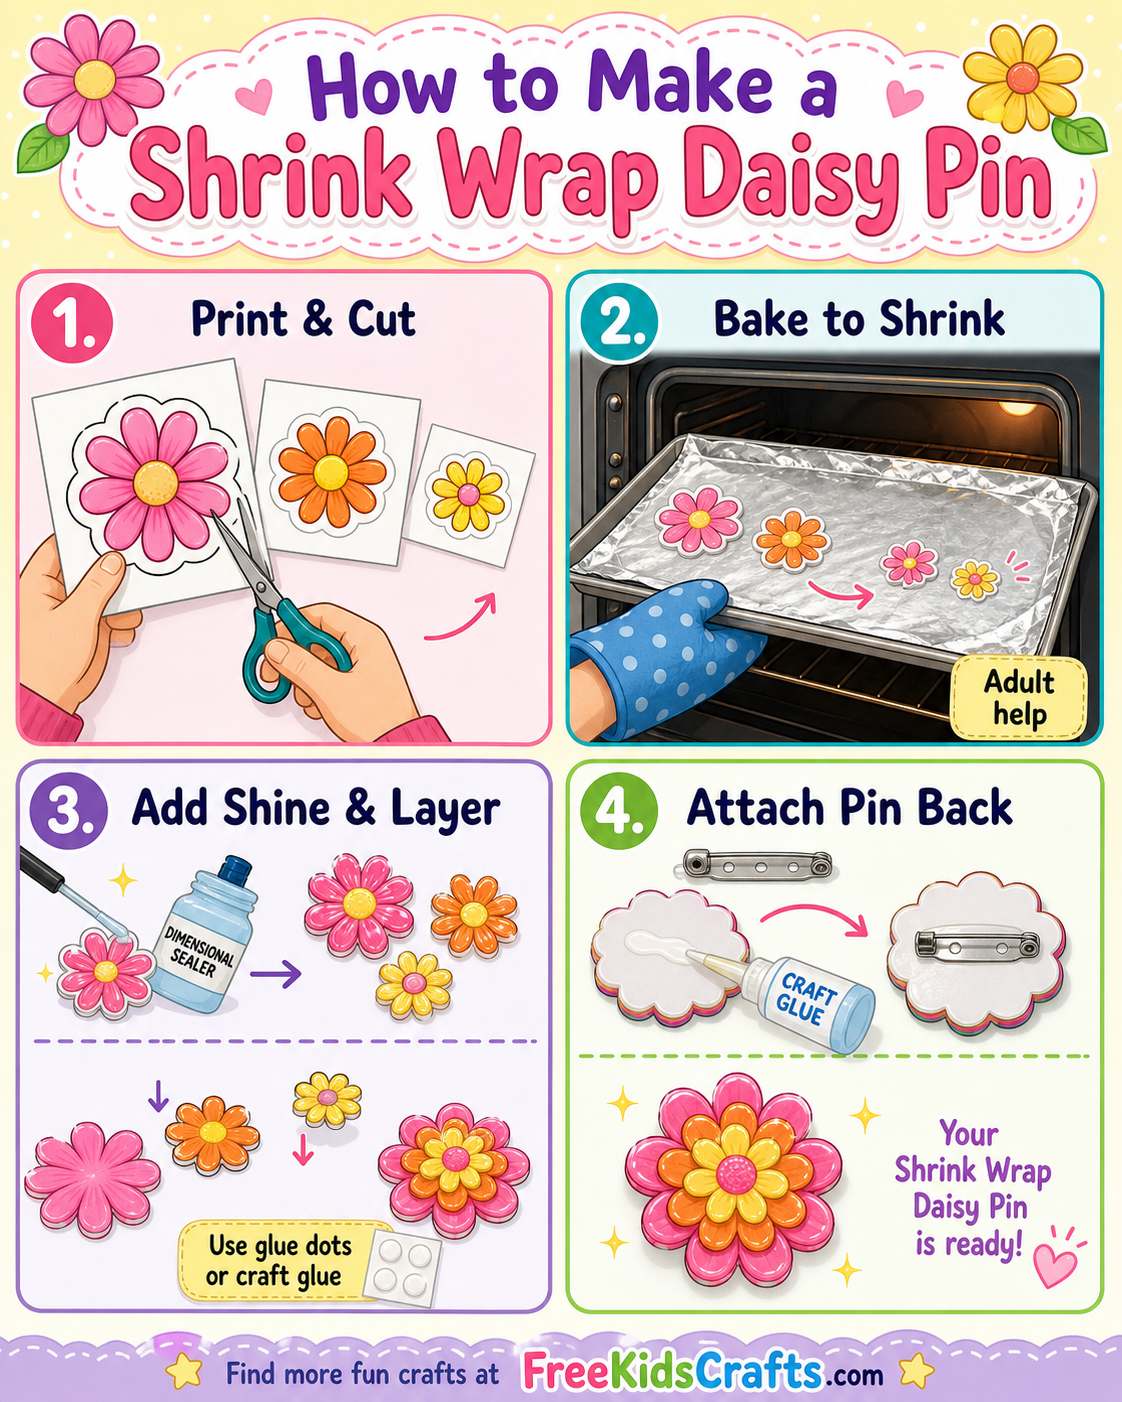
- Print the daisy patterns onto inkjet-friendly shrink plastic sheets. Be sure to read and follow the directions on your specific shrink plastic package, since printer settings and baking instructions can vary. Some brands may recommend using a transparency setting, lowering the ink output, or lightening the image before printing.
- Carefully cut out each flower shape. Younger children may need help cutting around the petals.
- Place the flower pieces on a foil-lined baking sheet, or use the surface recommended on your shrink plastic package. An adult should handle the oven step. Bake according to the package directions and let kids watch from a safe distance as the flowers shrink.
- Let the flowers cool completely. Coat each flower with Mod Podge Dimensional Magic or a clear craft sealer to give it a shiny, finished look and help protect the design.
- Once the coating is dry, layer the flowers on top of each other. Use glue dots, craft glue, or a low-temperature glue gun with adult help to attach the layers together.
- Glue a craft pin back to the back of the flower. Let everything dry fully before wearing or gifting your new daisy pin.
Heat Gun Option
Instead of using an oven, an adult can shrink the flower pieces with a heat gun. Place each cutout on a heat-safe surface, hold it in place with tweezers or a wooden skewer, and move the heat gun slowly over the plastic until it curls, shrinks, and flattens again. Let the pieces cool completely before touching them. This step should be done by an adult only, since the plastic and heat gun get very hot.
Craft Tips
Try mixing different flower colors and sizes to create a layered look.
Make several pins at once so kids can give them to moms, grandmothers, teachers, or friends.
This easy craft for kids can also be turned into magnets, backpack charms, or gift toppers instead of pins.
Patterns, Templates and Printables
Click on a pattern to open it in a new window to print.


Teacher Friendly Educational Extension
This shrink wrap daisy craft is a fun way to connect art and science. Before baking, have children measure the flower pieces with a ruler. After shrinking, measure them again and compare the sizes. Kids can talk about how heat changes the plastic and record their observations.
For a writing activity, ask children to write a short Mother’s Day message or a few sentences about who they would like to give their daisy pin to and why. Finished pins can also be used as classroom gifts, spring craft projects, or colorful handmade keepsakes.
Supplies
Flower Patterns
Shrink Wrap
Color Printer
Foil lined baking Sheet
Oven
Mod Podge
Glue Dots
Craft Pin Back
Scissors
Instructions
Click on Printables and print the daisy images onto Shrinky Dink inkjet sheets to start. Please READ THE DIRECTIONS CAREFULLY for your particular package of shrink paper, as they may vary. For example, You may to change your printer setting to transparency and low ink output and lighten your image. Just make sure you do exactly what it tells you to when printing. There, that was the hardest part. After you have your images printed and then cut out, you are ready for the oven. Put your images on a foil-lined cookie sheet, but again you should do whatever the package instructions recommend.
If you have kids around your house, make sure they get to watch the shrinking magic. It’s the little things in life, what can I say? Look at how much brighter (and smaller) they are after you shrink them. Love!
Next, coat each flower with Mod Podge Dimensional Magic . This makes them super shiny and protects the images. When that is dry, layer the flowers on top of each other and use some Zots glue dots to affix them in place. You can use a glue gun or other glue you have lying around if you prefer.You can put the three different sized flowers together alternating the colors or you can do it however it suits your fancy.
Editors Note: We have supplied you with a couple of the flower printables but more sizes are available at ChicaandJo.com.
Patterns, Templates and Printables
Click on a pattern to open it in a new window
Contributor
"We are Chica and Jo and we are crafty, frugal, and fun! We will help you unlock your inner crafter with new and creative projects, using inexpensive, everyday items. Visit us whenever you need ideas, crafts, or inspiration for just about anything! Our hundreds of free tutorials loaded with photos and video make us your ultimate online guides for all things crafty."